
Using GitHub Classroom
Published:
In this article, we’ll explore GitHub classroom as a tool to manage classroom assignments. GitHub classroom creates assignments that students “accept” as git repositories. They can work with their repository on any computer and synchronize or backup their work to the GitHub cloud. Using GitHub practices like Pull Requests, students can request help from the instructor and receive line-by-line feedback right in the repository, all while developing good habits in the use of git repositories. Instructors can automate downloading and grading through scripting or through the GitHub Classroom Assistant tool. In addition, assignments can be specified as group assignments, which create shared repositories as you organize students (or as they self-organize) into teams. GitHub classroom also allows you to tie your assignments to a “starter repository” in which you can post boilerplate materials or code, instructions, rubrics, and FAQs that you can evolve over time.
What You Will Need
Because GitHub classroom is built on GitHub and git infrastructure, it is important to understand some git and GitHub basics before using GitHub classroom. You and your students can get started with a working knowledge of just a few features, and we’ll summarize them here. Before starting, you should have the following:
- A GitHub Account: You and your students will each need a GitHub account.
- A git installation: Most Linux distributions have a package manager through which you can install a git client. There is a Git Bash utility for Windows that you can download and install as well. In these examples, I’ll be using Cygwin, a POSIX layer for Windows that provides a Linux-like shell terminal along with common GNU and Open Source tools like git. The commands used here will work in other environments, too. You can also use TortoiseGit on Windows for a graphical tool that integrates with Windows Explorer.
- Basic Experience with git: For an overview of git as a version control system, see my article on using Git with GitHub.
Using GitHub Classroom
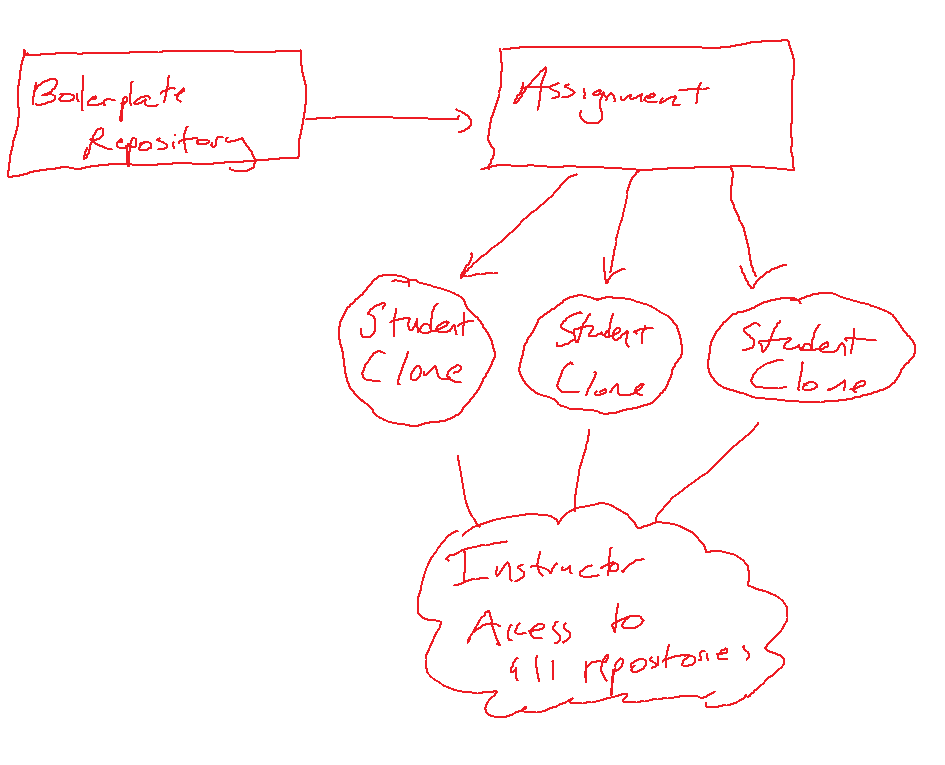
The basic workflow of GitHub classroom allows you to create a boilerplate repository that contains your assignment starter code and instructions, and to associate that boilerplate repository with an assignment. The assignment is then cloned as individual student repositories by your class, without requiring you to coordinate all the repositories and which students have which repositories. The workflow looks like this:
GitHub in the classroom provides a number of benefits with minimal setup requirements that you can re-use from class to class. These benefits include:
- It’s backed up, less worry about losing files
- Files can be cloned on other devices - this is nice for working at home or outside the classroom/lab
- Version history allows for rolling back and experimentation (can use branching in more advanced environments)
- Collaboration is facilitated with shared repositories, and you can track contributions to ensure mutual collaboration
- Students can ask for and receive help through Pull Requests
- Students can practice with industry standard tools and workflows
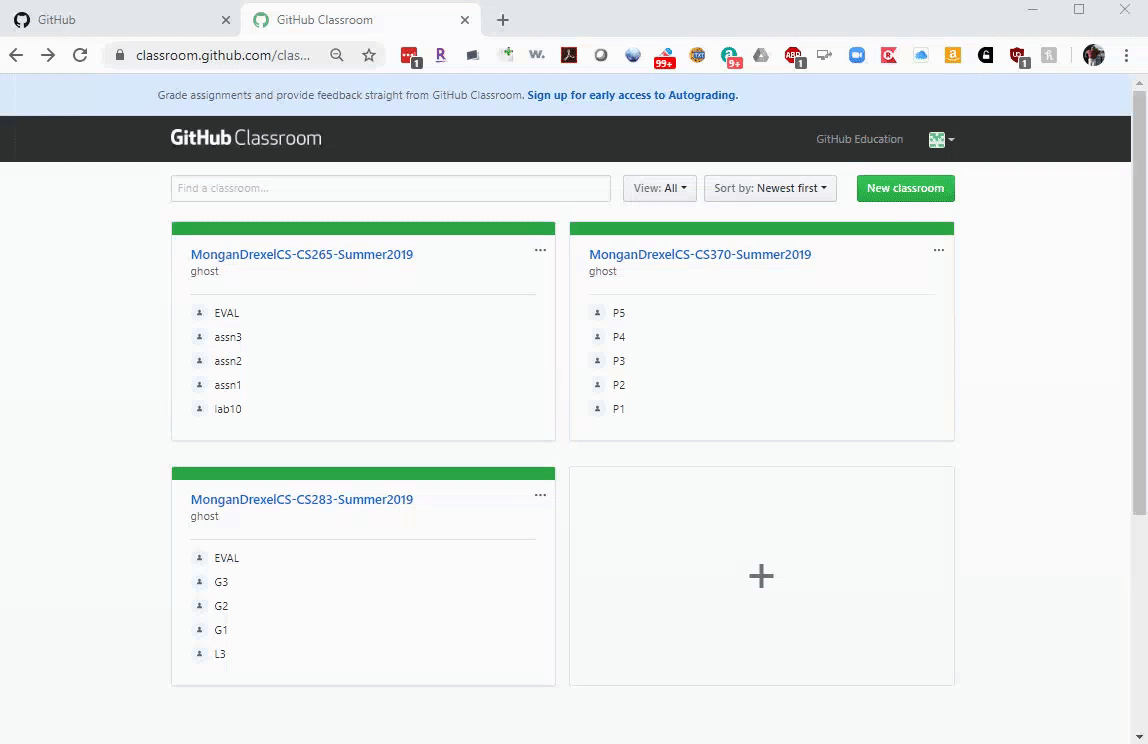
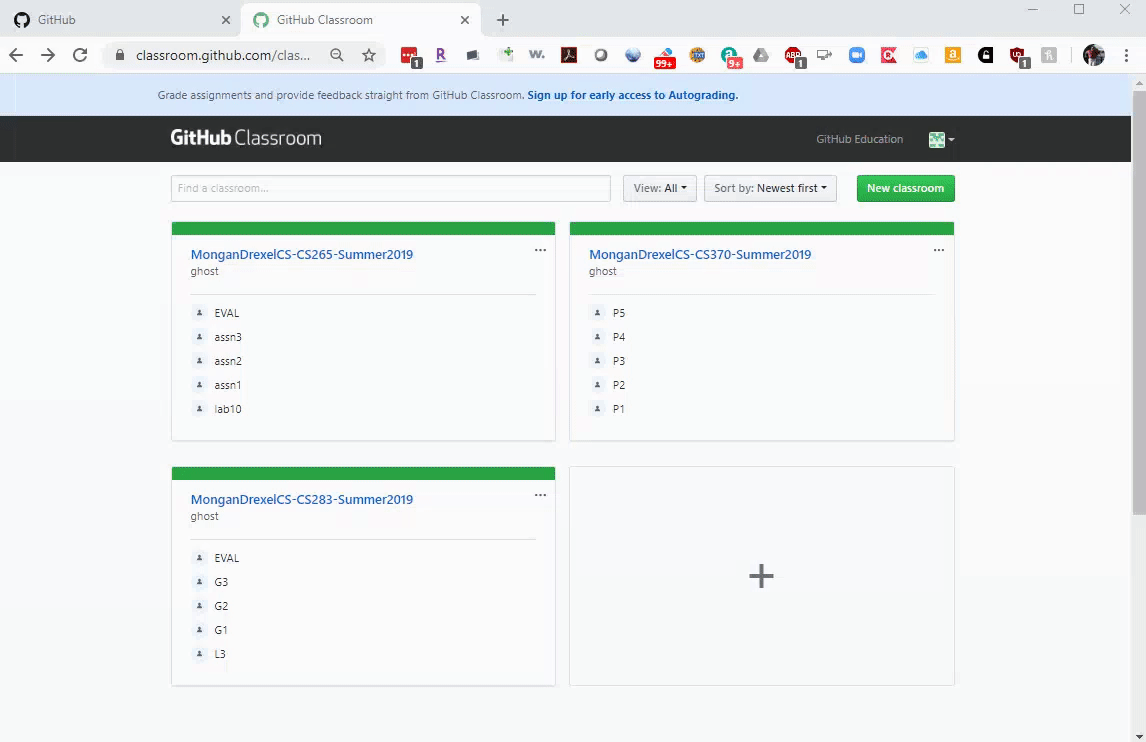
Step 1: Creating a new Classroom under Your Organization
Creating a GitHub Organization
If you already have a GitHub Organization, you can skip this part and go directly to creating a new classroom under that organization. You only have to create an organization once.
GitHub Classroom uses Organizations to manage your classrooms, assignments, and student repositories. You and your TA’s (and co-instructors) will be members of your organization (they’ll be added throughout the process, so you don’t have to do this all yourself). In addition, student repositories will be incorporated into your organization when they accept assignments, and you can provide roster information whereby students can associate themselves with their GitHub account. When I use the student roster, I like to use aliases that I share with my students (or that they share with me) so that no personal information is actually divulged.
If you are within an academic institution, you can petition GitHub to make your organization a “Pro” organization free of charge. This enables you to create assignments for which student repositories will be private. This is really important to me, because I don’t want independent student classwork to be made public! In this example, I’m just creating a personal organization, but this means that the repositories will be public. As an educator, you can apply for GitHub Education benefits here by clicking “Get Benefits” at the top right.
Your TA and instructional team will be administrator members of your organization, so they will have access across your classrooms. Because of this, I tend to prune the list of instructional staff each semester.
Creating a GitHub Classroom
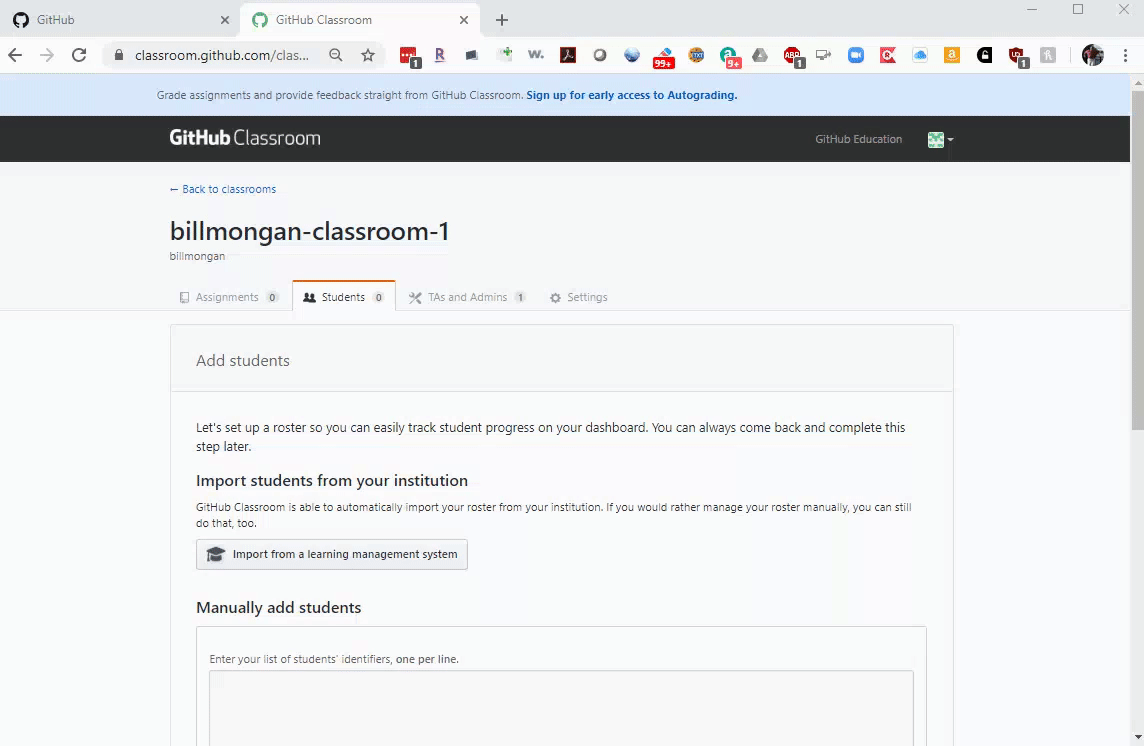
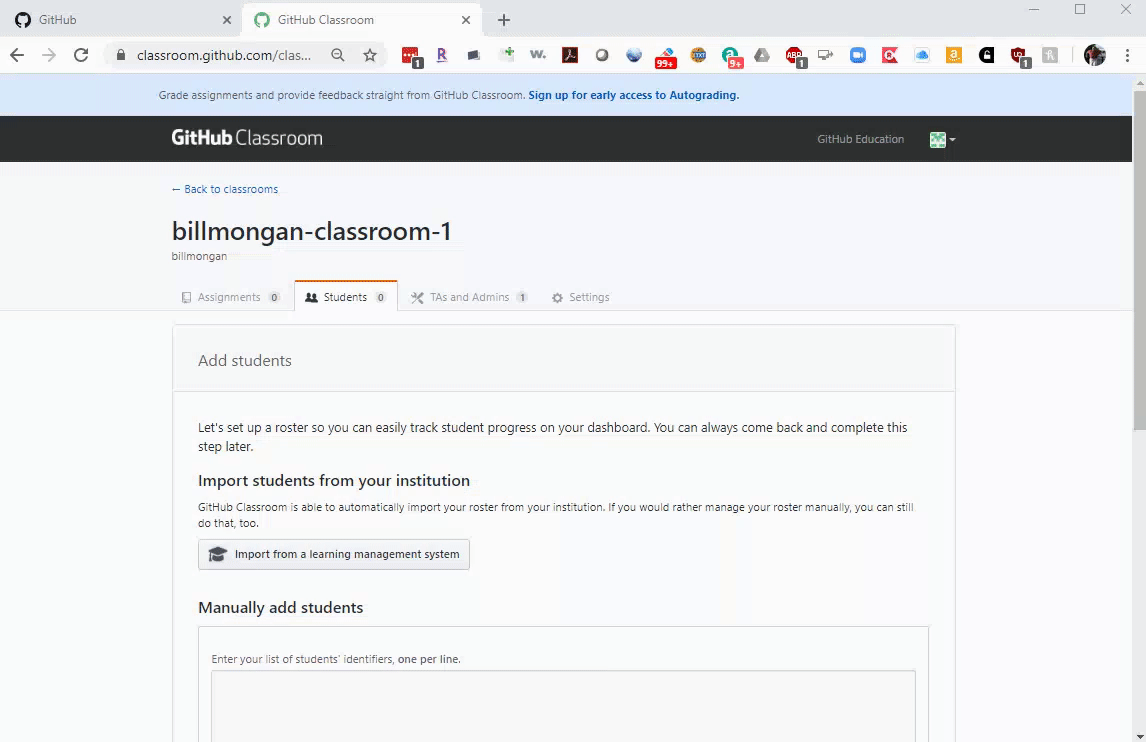
Step 2: Setting Up Your Roster and TA Access
You will be given invite links for students and for TAs to add themselves to your organization and classroom.
Pro Tip: I suggest creating your roster first before sending these out, so that students can associate themselves with student ID’s (assuming you haven’t automatically populated these from your LMS).
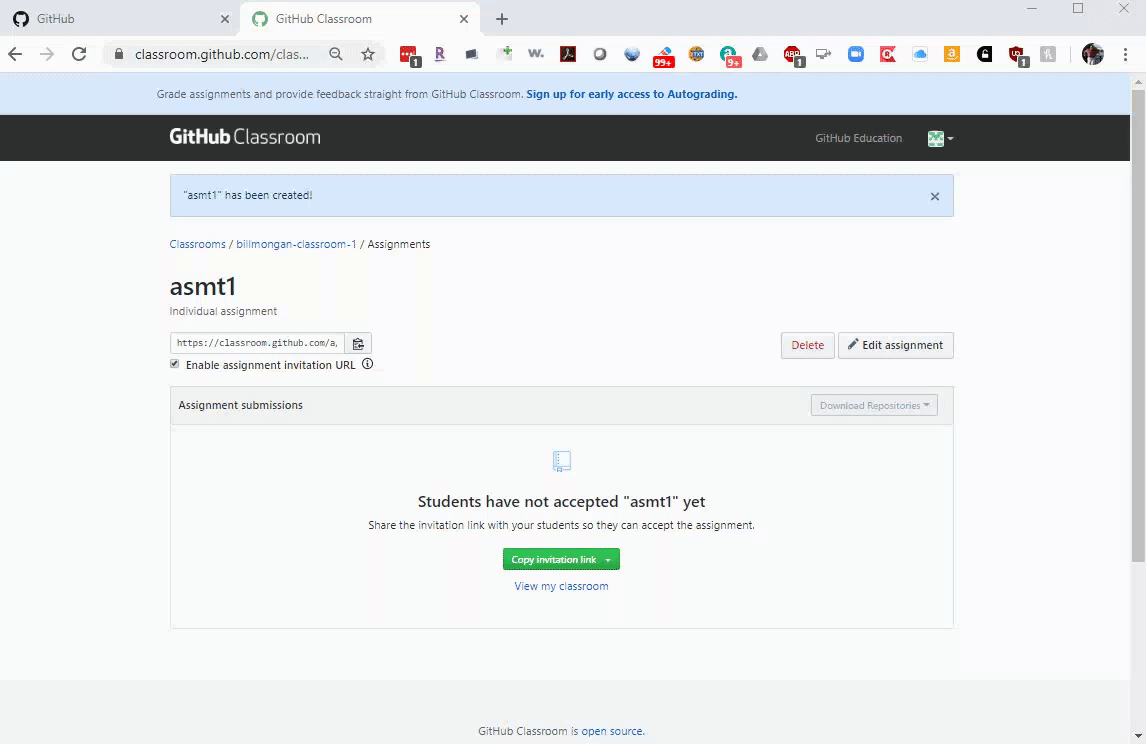
Step 3: Creating Assignments
If you specify a starter code repository, that repository will be copied into each student’s repository when they accept the assignment. You can specify a deadline as well. If you do this, the Classroom Assistant tool will download the repository as it was at that time. No commits after the deadline will be seen. You can even push to the student repositories as a grading mechanism. I tend not to do this, so as to avoid posting grading information to a potentially public forum, but it’s useful for private repositories. In addition to creating an individual assignment, you can create a group assignment. When students accept an assignment, they will be able to organize into a team of up to N students (a number you can specify). You can also re-use existing groupings to keep teams together.
Pro Tip: I like to create boilerplate “starter” assignments to house my instructions. By storing these in README.md, the GitHub repository page will show them to your students when they natigate there, so I can link directly to the repository page from my course page. You can also include starter work like template code. This way, I can focus instead on evolving the assignments! This is useful for instructions, boilerplate materials, FAQ materials, and rubrics.
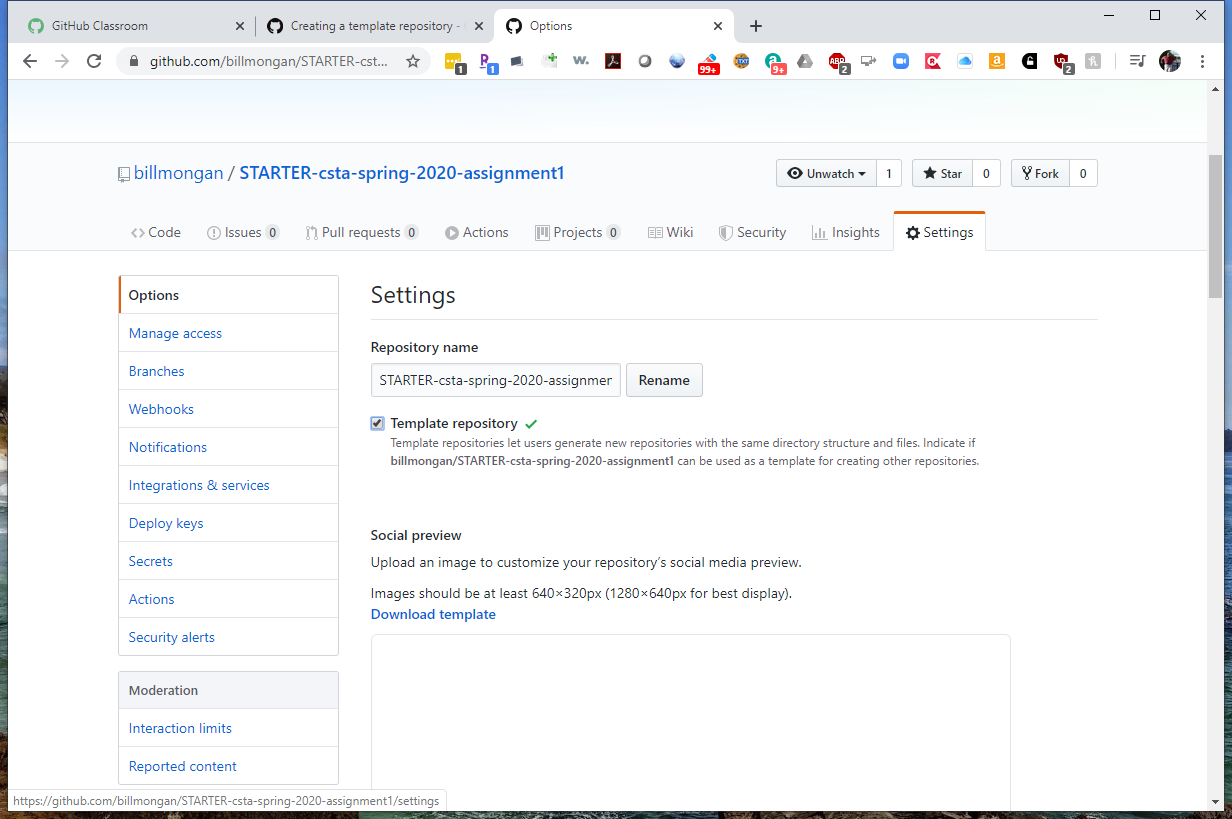
Any repository can be a “starter repository” since you’ll select it when you create the assignment. Just be sure to set the starter repository to a “Template Repository” which GitHub uses to copy the repository to the student. You can do this retroactively under the repository “Settings” menu, under the main “Options” pane.
Pro Tip: I suggest that you do not make students administrators on these accounts, so that they can not modify their sharing settings on the repository. This helps ensure that they do not accidentally make their repository public.
Pro Tip: The repository names will start off with the name of the assignment (i.e., assignment1-ABC123). I like to set my assignment names/classroom names/assignment prefixes with the current semester/year (csta-spring-2020-assignment1). This makes it easier for me to quickly filter by class, section, and year. Since GitHub Classroom names the repositories, this is much more convenient than asking students to name their repositories according to a schema (which some may forget to do!).
Student View: Accepting an Assignment
When students accept an assignment, you’ll have a record of it, and they will get a repository that is shared with you and the TA’s (and any students in their group, if you created a group assignment).
The first time a student accepts an assignment, they’ll be able to assign themselves to a student in your roster. This allows you to associate a student’s GitHub account name to their actual student identifier.
I tend not to link my GitHub Classrooms with a school roster or LMS, so that I do not risk compromising sensitive student data. I allow them to self-associate. There is a risk here that a student will mistakenly identify with another account. If this happens, that student will not be able to associate with their account. In practice, I have not had a problem with this, but you’ll want to ensure that students are representing themselves properly if you’re allowing them to self-assign their account to a student on the roster.
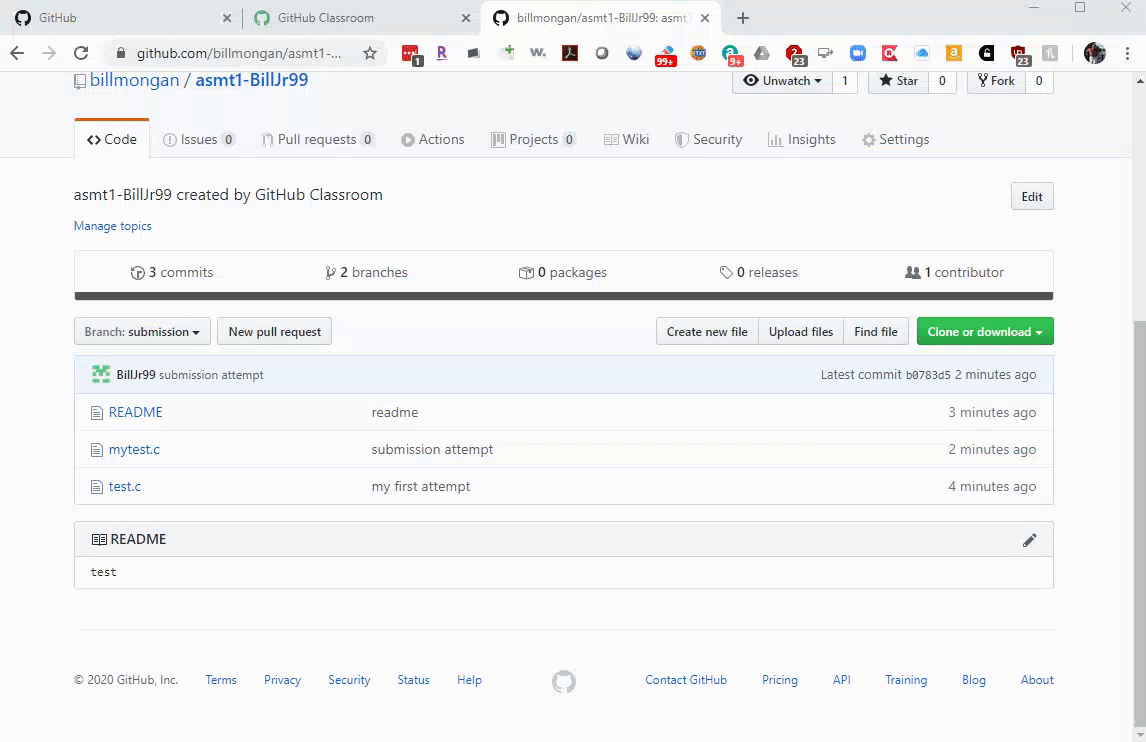
Once the student has accepted the assignment, they can work with it like a normal git repository. GitHub Classroom saves you the effort of asking students to configure their own repositories, share it with their team members, make the repository private, share it with instructors, etc.
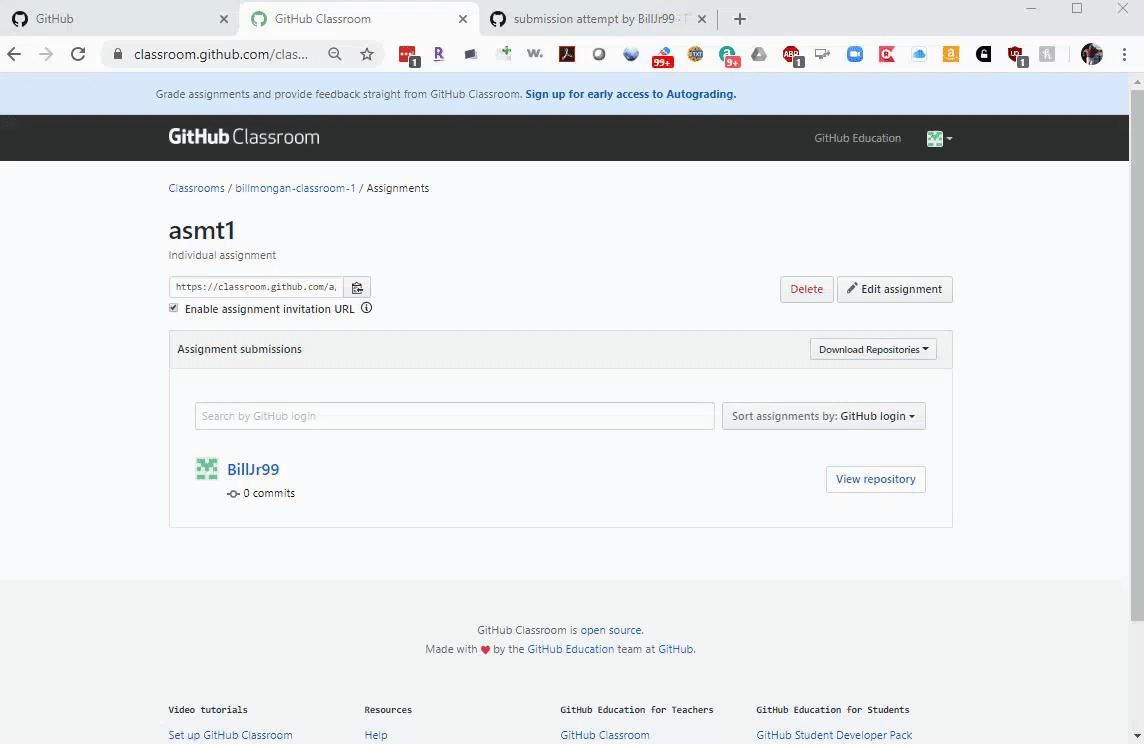
Step 4: Downloading Assignments for Grading with the GitHub Classroom Assistant
When it’s time to pull all the repositories, you can use the GitHub Classroom Assistant to identify and clone all the repositories associated with your assignment. You can also access their repositories directly and push grading information or feedback once they are cloned (or via the GitHub web interface).
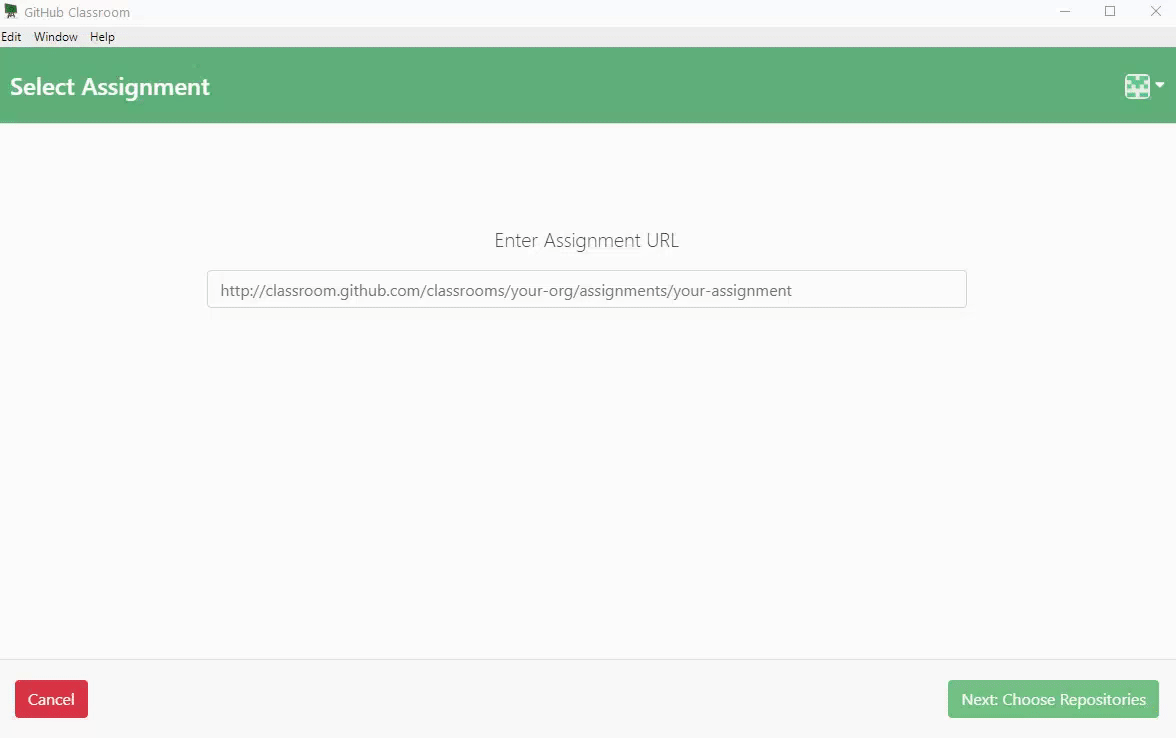
Note that the link you give to GitHub Classroom Assistant is the web link of your GitHub Classroom Assignment page - it’s not the git link itself nor the invite link.
Pro Tip: I have Two Factor Authentication enabled on my github account, so I can’t check in files that GitHub Classroom Assistant downloads. Below, I’ll share links to scripts that will automate checking out classroom repositories using your SSH public key, which will enable pushing to the repositories without authenticating with a password.
You can push directly to the student’s repository for them, or you can create a file on-the-fly through the repository webpage. You can click “Create New File” to create a text file, which you can save, commit, and push from the web interface.
Optional: Using Branches to Create Pull Requests to Request Help from the Instructor
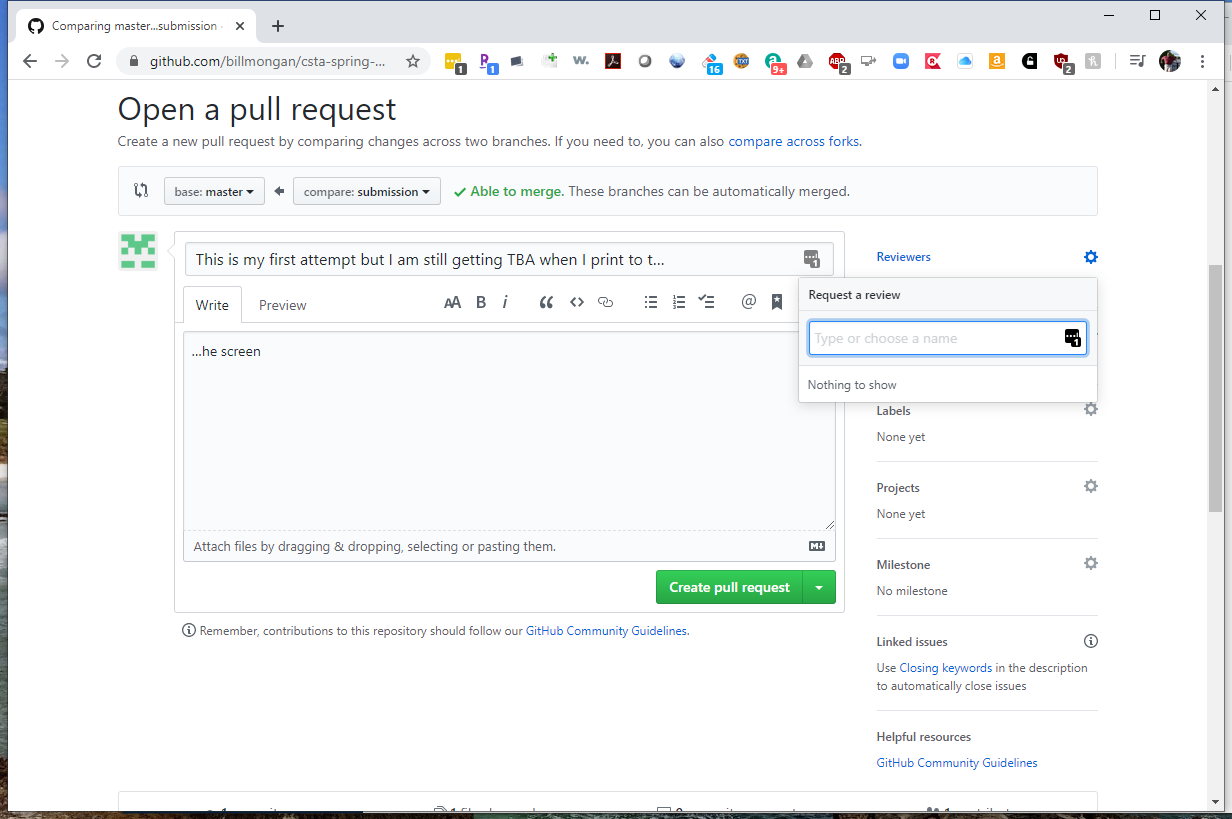
Student View: Creating a Pull Request on a Branch
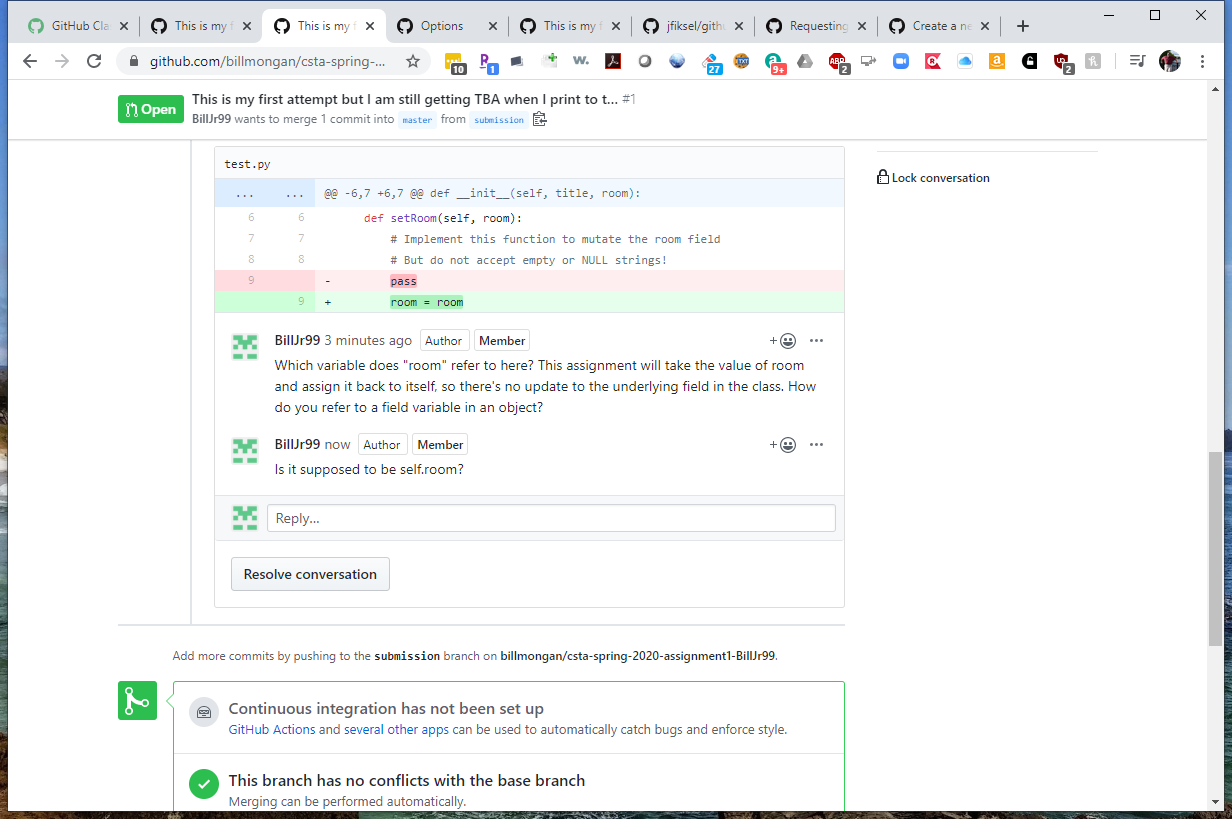
If students work in a branch, they can make Pull Requests on that branch to request reviews and comments from the instructor along the way. This is a great way to ask questions and seek help.
Students can specify which instructor(s) (or team members) to specify as reviewers; they’ll get a notification to view the Pull Request.
Instructor View: Managing the Pull Request
Opening the Pull Request
Pull Requests can be found under the “Pull Requests” menu of the repository page.
Pull Request Review: Commenting on the Pull Request
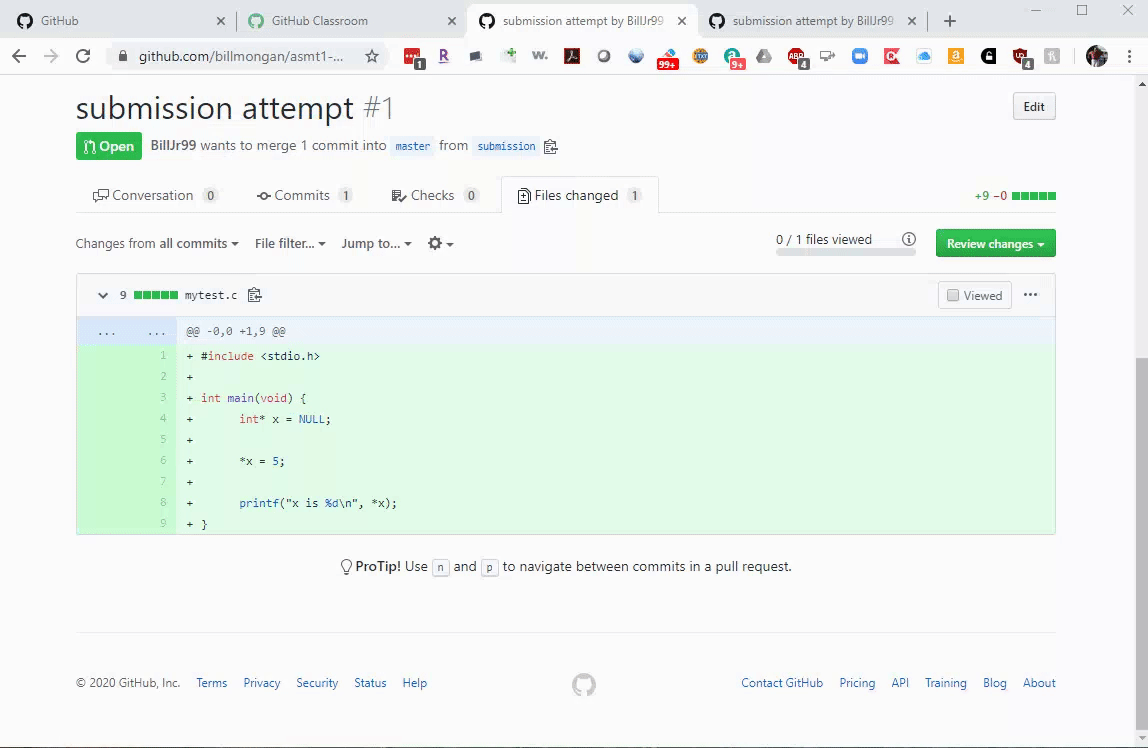
You and the student can continue commenting on the Pull Request until the issue is resolved. Meanwhile, the student can continue committing to the branch, so that any “broken code” does not corrupt their master branch while they collaborate with you.
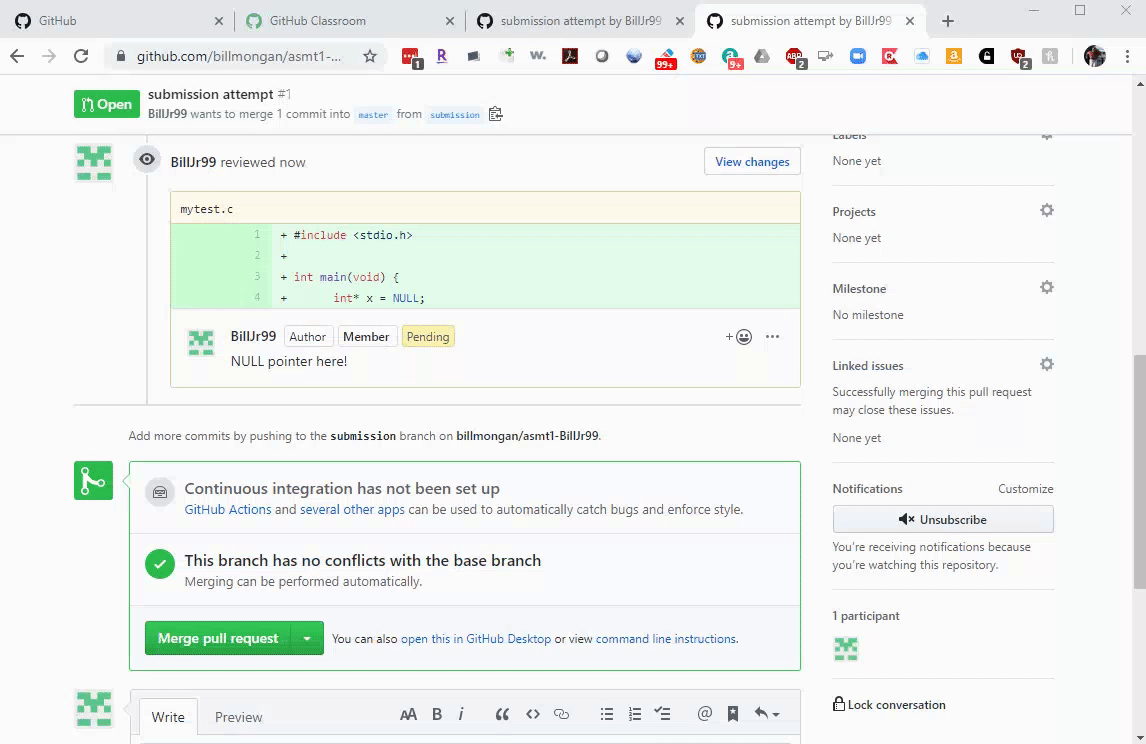
Student View: Merging the Pull Request / Branch
Ensure that students remember to merge their pull request (and, ultimately, their branch) into the master branch. This will make it easier for you to find their work when you download their assignments. By default, you’ll see the master branch, and that will be empty if they only worked in an unmerged branch. So, although branches are really useful in practice and to generate Pull Requests to get help, it’s also helpful to merge them back into master before submitting. My students sometimes forget to do this, and I see an empty directory at first when I clone!
Optional: Using a Script to Pull Repositories
One drawback to using the GitHub Classroom Assistant to clone repositories is that, as far as I have seen, the Assistant uses HTTPS to clone the repositories. This makes it more difficult to push to the repository since password rather than public-key access was used. To authenticate with your SSH public key, you’ll want to use SSH to clone the repositories. These clone URLs begin with “git@github” as opposed to “https” and can be chosen from the GitHub repository homepage when cloning the repository, but GitHub Classroom Assistant does not appear to allow us to make this choice. You can use a shell script to download your repositories instead. This requires a Unix/Linux installation, a Mac with a shell terminal, or the Ubuntu Subsystem or a POSIX layer on Windows. I use Cygwin, personally, but these other environments should be equivalent.
GitHub user konzy created, and jfiksel forked, a mass_clone github clone script. Cloning this repository provides a clone_all.sh script that will identify all your assignments and clone them over SSH using your public key (so you don’t have to enter a password!). It is run as follows, from the directory in which you’d like your cloned repositories to appear:
./clone_all.sh <Your GitHub Organization Name> <Assignment Identifier> <Your GitHub Username> ssh
The script will prompt you at the terminal for your password. Your GitHub organization is the name of the organization you used when you created your GitHub Classroom, and the Assignment Identifier is the portion of the URL that appears when you click on an assignment from the GitHub Classroom web page.
The ssh parameter specifies that ssh links should be used; the scripts do allow for https to be specified as the argument instead, and will clone using that protocol instead.
The push_all.sh script is another useful one to upload your grading comments to all repositories with a single command. It will add all files you’ve created in the repository and commit/push them to the students’ repositories.
jfiksel also created some nice guides to using GitHub Classroom in a similar spirit to this guide here. There is an article for teachers and one for students.
Using a Script with GitHub Two-Factor Authentication
If you are using two-factor authentication, you won’t be able to enter your usual password to the command line script. This is because there is no mechanism to execute the second factor, as you would with a web browser. GitHub allows you to create an app-specific password for this purpose: you’ll use it with your script, and no two-factor authentication is used. The disadvantage is that this bypasses two-factor authentication, but the passwords generated are often (hopefully!) stronger than a typical user password. Here is a tutorial to create an app-specific password on your GitHub account. You can assign repository permissions if you are only cloning/pushing to repositories, when it asks you for permissions on the app-specific password. It is a best practice to select only those permissions that are actually required of your app when using this password.
Closing Thoughts
GitHub Classroom is a useful tool to teach git in the classroom, and to manage student work among instructional staff and among peer student groups. I’ve found a few tips and tricks in my workflow along the way, as you’ve seen above, but I’ve found this to help me manage student work in a meaningful industry platform. I like when students develop best practices while doing their work: often, we’re rushed to teach something and we forget to emphasize good habits along the way.
Here are some videos from the GitHub Classroom team that walk through many of the steps described in this guide, for your reference.
Errata
- A prior version of this article indicated that students are added to your GitHub organization along with TA’s and co-instructors. Although students can be added to a classroom via the roster (or by linking to a Learning Management System), they are not actually added as organization members. Rather, they are collaborators on the repositories that are created when they accept an assignment.