CS375: Software Engineering - git (100 Points)
Assignment Goals
The goals of this assignment are:- To use git to set up a shared software repository
Background Reading and References
Please refer to the following readings and examples offering templates to help get you started:The Assignment
In this assignment, you will set up a git repository, share it with others, and practice commit, push, and pull operations from the repository.
You will also create and add an ssh key to your git repository for password-less access.
Finally, you will induce and resolve a merge conflict with your partners.
Background
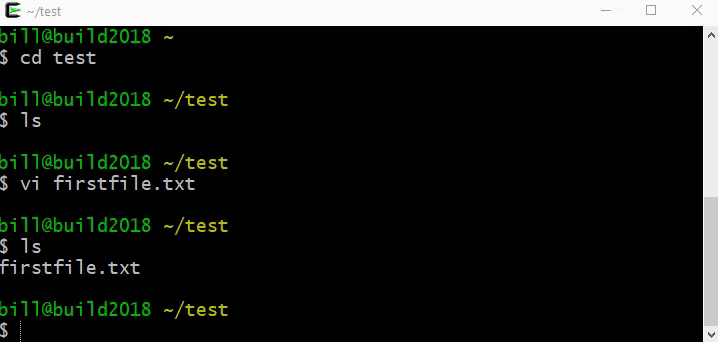
Installing git
If you do not already have git installed (for example, if you open a terminal and type git, but the command does not execute), you can install it from https://git-scm.com/.
Adding your ssh key to github
SSH Keys allow you to present a certificate to the GitHub server that authenticates your user account from your computer. It is an alternative to password-based authentication. You can create an SSH key, which will create two files on your “home directory” called .ssh/id_rsa and .ssh/id_rsa.pub. The .ssh/id_rsa.pub file contains your public key and is the file you will share with GitHub. The private key in the other file corresponds to your public key, and, as the name implies, should not be shared with anyone (as it will enable authentication against the public key).
Once the key is created, you can copy the public key text and paste it on the GitHub website to add it. It’s a good idea to name the key, in case you get a new computer and start a new key; it’s a good practice to remove unused public keys from GitHub and other servers.
If you are using TortoiseGit, you can use a tool to manage your SSH keys from Windows. See this article for details.
The video below demonstrates how to create and add your ssh key to your github account.
Summary
In summary, you can execute the following commands to create an SSH Key.
ssh-keygen -t rsa
cat ~/.ssh/id_rsa.pub # outputs your public key so you can copy and paste it
Copy this key and paste it into your github user settings menu under SSH Keys. You can now execute ssh commands that login to your account without typing in your password! These keys allow you to encrypt data: data are encrypted using your public key by anyone in the world, and decrypted using your private key (which only you have).
Interestingly, you can encrypt data with your private key, which will prove to the world that you generated that data. This is because anyone with your public key can decrypt your message, and only you could have generated it with your private key. This is known as generating a digital signature, and it is used to facilitate passwordless login.
Treat your private key like a password! If you lose it, you should generate a new one and remove the old public key from any services you use.
Configuring your git Client
You can add your name and email address to your git client by running these commands, which will associate your commits to the repository with you.
git config --global user.name "Your Name"
git config --global user.email "your.name@email.server"
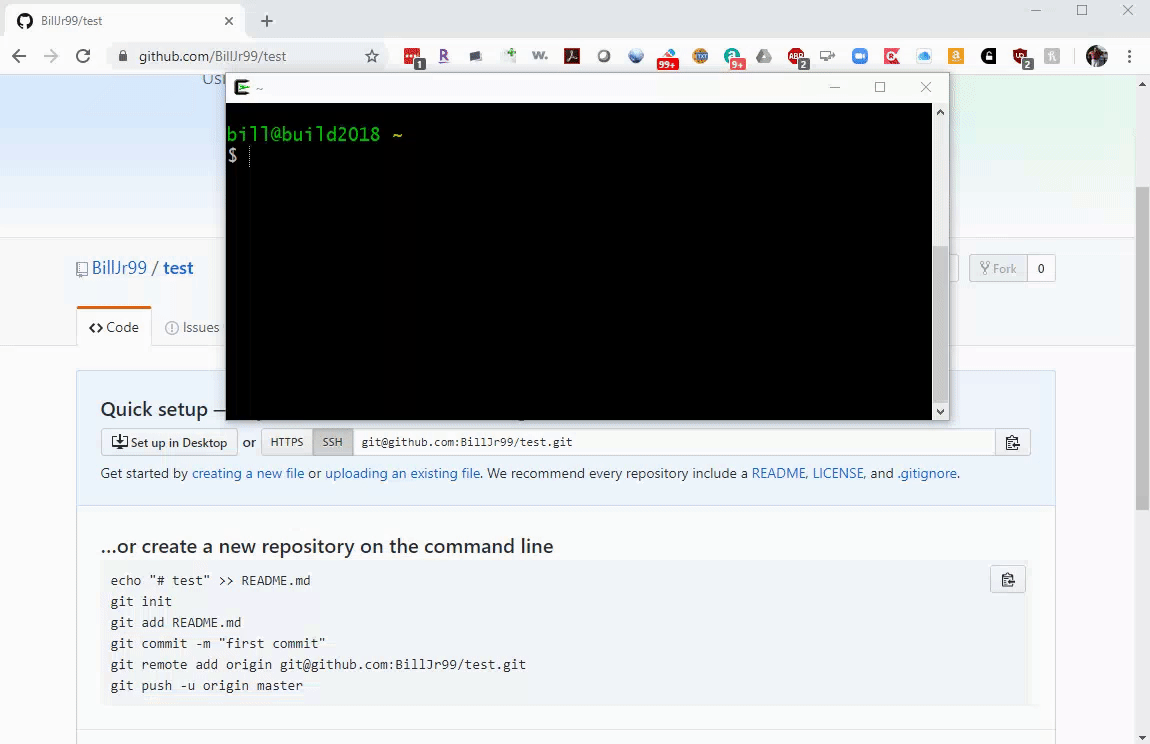
Creating and Sharing a git Repository
Follow the steps below to create a github repository. Your project will present you an ssh link (do not use the https link) under the “Code” button once you create the project.
Checking out your Repository
Cloning the repository downloads it to your local computer. You can do this as many times as you wish, and synchronize across them. You can even share the repository with other users, and they can operate on the repository locally as well.
Pushing and Pulling to your Repository
Sometimes, you’ll have private files in your repository directory that are important, but too senstive (or just custom to each local computer) to save to the remote repository in the cloud. For this reason, you’ll explicitly add each file that you want to upload to the cloud. Note that you also add files that you’ve modified even if they already exist.
Once you’ve added your file(s), you can commit your changes to the repository. This creates a log timestamp that you can see in the repository to track who did what and when. You can even roll back your repository to any point in time marked by one of these commits. It’s a good idea to commit relatively often, whenever a major milestone is reached that you might like to revert to or review someday. It’s also a good idea to specify a commit log message so that these commits make sense beyond simply what files were modified and how. This is specified with the -m flag to git commit.
Before git came along, repositories would often automatically sync to the remote in the cloud as soon as a commit was made. This might even seem reasonable at first glance. But not all computers are connected to the Internet at all times, and so it is helpful to separate these operations so that you can make commits while offline. After you have made one or more commits, you can push them to the remote in the cloud.
It is strongly recommended that you pull from the repository with a git pull command prior to pushing your own commits using git push to resolve any conflicts that may exist. More on this later.
Removing Files
In addition to adding files, you can also remove files from the repository with git rm. You’ll commit and push these changes just like with add operations.
One final note: it’s a good practice to pull the repository from the remote cloud before performing a push operation. In fact, it’s required if anyone else has pushed commits that you have not yet downloaded. You can use the git pull command to do this, and should plan on doing this at least any time you push.

Creating a Branch
Things can get messy if there are many people working on many different parts of a repository with different objectives in mind. It is nice to have a “sandbox” to work in that is separate from the rest of the team, and then to merge that sandbox back into the main repository when you are finished. These “sandboxes” are called branches. You can create a branch using the git branch <branch name> command, and switch between branches using the git checkout <branch name> command. Git provides a shortcut when creating a new branch that executes both operations: git checkout -b <branch name>.
Initially, the branch will be identical to the current branch, but it will be on its own independent commit timeline.
You can commit and push to your branch like before. When pushing to (or pulling from) a particular branch, you can specify the branch to git via git push <remote> <branch name>. By default, the GitHub remote is called origin, so you would enter git push origin <branch name>. You can have more than one remote, which would allow you to sync with multiple remote servers or to create custom actions to occur when you push commits. This is beyond the scope of this article as we won’t need it for GitHub classroom, but if you’re interested, you can find out more here.
With GitHub, it’s possible that a single user or subset of users are in charge of the main branch, into which these branches would often be merged. To request a code review and merge of a branch, you can create a Pull Request that seeks a review, comments, and ultimately a merge of the branch.
Merging a Branch
You can merge a branch into your existing branch using the git merge <branch name> operation. You can checkout the target branch first, and then merge the other branch in.

Notice that you do not need to commit after performing a merge: the merge is a commit on your current branch. If you perform a git commit, it will provide you a helpful reminder about this. Instead, you can go ahead and push to the remote GitHub server when you are ready.
Resolving a Conflict
Sometimes, team members make changes to the same parts of the same files in different branches (or from different local checkouts). A conflict occurs when this happens. Git offers you some guidance in how to resolve these, and allows you to specify the details as a new commit. You can find more details on how to do this here.
At the console, you can edit the file in conflict and manually resolve the conflict. The file will show the conflict like this:
<<<<<<<
Data on the server
======
Data from your local commit
>>>>>>>
Alternatively, you can type git checkout --theirs to use the server copy and overwrite your changes, or git checkout --ours to use your version. Add, commit and push the repository like you would for any other modified file.
What to Do
- Create a git repository and share it with the members of your group. Everyone should do this individually!
- Commit files to everyone’s repositories, including your own.
- Create a branch, make some edits, and merge the branch.
- Create a conflict, resolve it, and check in the resolved file.
- Share the repository with the instructor, who can verify your work using your git commit history. Submit the git ssh link.
- Create a branch in your repository called gh-pages, and add a file called index.md. Put some text into that file, commit and push it. In the settings for your repository, enable github pages, and go to https://your-git-username.github.io/your-github-repository-name. You should see your content!
Submission
In your submission, please include answers to any questions asked on the assignment page, as well as the questions listed below, in your README file. If you wrote code as part of this assignment, please describe your design, approach, and implementation in a separate document prepared using a word processor or typesetting program such as LaTeX. This document should include specific instructions on how to build and run your code, and a description of each code module or function that you created suitable for re-use by a colleague. In your README, please include answers to the following questions:- Describe what you did, how you did it, what challenges you encountered, and how you solved them.
- Please answer any questions found throughout the narrative of this assignment.
- If collaboration with a buddy was permitted, did you work with a buddy on this assignment? If so, who? If not, do you certify that this submission represents your own original work?
- Please identify any and all portions of your submission that were not originally written by you (for example, code originally written by your buddy, or anything taken or adapted from a non-classroom resource). It is always OK to use your textbook and instructor notes; however, you are certifying that any portions not designated as coming from an outside person or source are your own original work.
- Approximately how many hours it took you to finish this assignment (I will not judge you for this at all...I am simply using it to gauge if the assignments are too easy or hard)?
- Your overall impression of the assignment. Did you love it, hate it, or were you neutral? One word answers are fine, but if you have any suggestions for the future let me know.
- Using the grading specifications on this page, discuss briefly the grade you would give yourself and why. Discuss each item in the grading specification.
- Any other concerns that you have. For instance, if you have a bug that you were unable to solve but you made progress, write that here. The more you articulate the problem the more partial credit you will receive (it is fine to leave this blank).
Please refer to the Style Guide for code quality examples and guidelines.