CS173: Intro to Computer Science - Unit Testing with the NetBeans Software Environment
This guide has been adapted from Professor Tralie.
Unit Testing
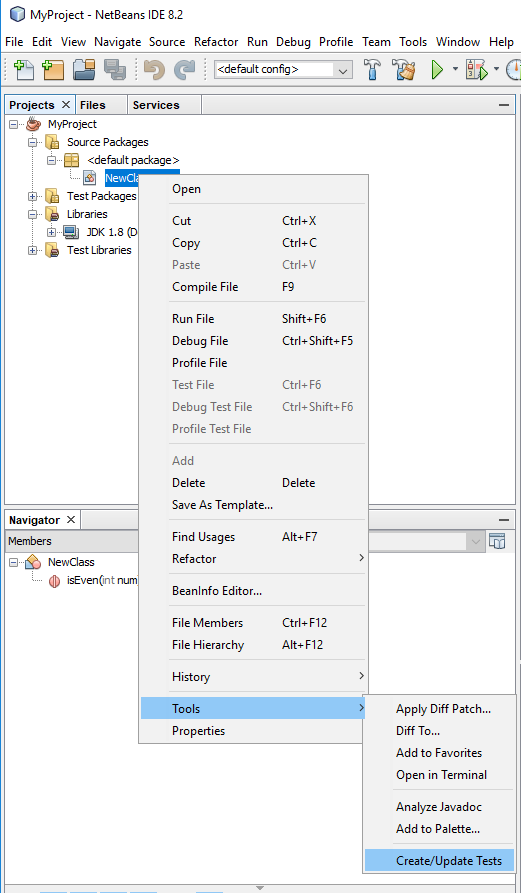
Let’s say we want to test the code method we provided in the introduction article with JUnit. You can follow the instructions in that article to create the sample project in NetBeans. Then, right click on the class file, then choose Tools -> Create/Update tests on the primary class of that project.
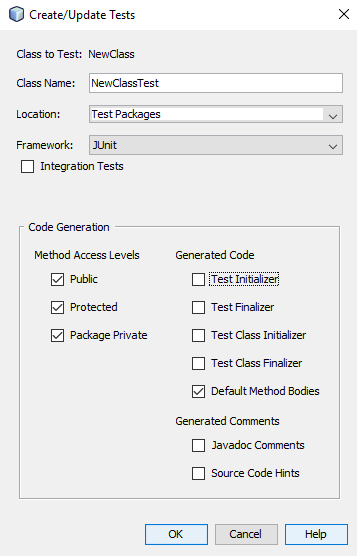
Then, check/uncheck the following boxes
Note: You may need to replace your import lines, if you see the word jupiter in them. You can specify JUnit 4 in the Create/Update Tests window when you create your tests (it’s ok to re-create them if needed), and then delete the imports in your test file and replace them with these instead, if so:
import org.junit.Test;
import static org.junit.Assert.*;
This will create a new file for testing with an example test method for each method you created in your original class. You should be careful to comment out or delete the fail line at the end of the test, and be sure that your inputs and expected outputs are the expected behavior of your method. Once you’ve done this, you can right click on this file and click run, and the results of the test will be shown in a window:
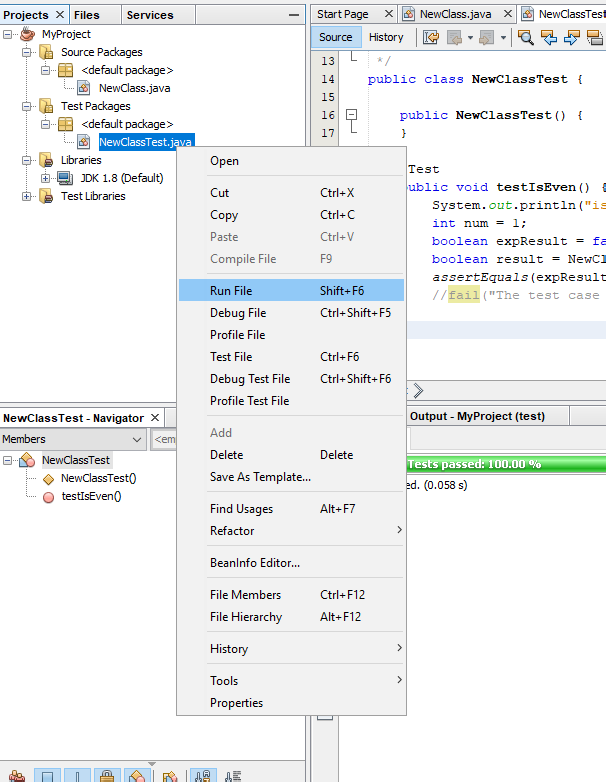
If you are interested in trying this test case out for yourself, here is the code from the screenshot above. This test case asks if 1 is an even number, and should pass because it expects that the function will return false.
import org.junit.*;
import static org.junit.Assert.*;

public class NewClassTest {
	public NewClassTest() {
	}

	@Test
	public void testIsEven() {
		System.out.println("isEven");
		int num = 1;
		boolean expResult = false;
		boolean result = NewClass.isEven(num);
		assertEquals(result, expResult);
		//fail("The test case failed");
	}
}
You will notice that the junit library comes with some new functions: assertEquals and fail. assertEquals will check that the two parameters (for example, result and expResult above) are equal, and fail the test if they are not. There are other assert methods as well, that check for other conditions.
The fail method automatically fails the test, and is suitable for use in your own if statements. Sometimes, NetBeans and JUnit include a fail statement automatically in your unit tests as a reminder for you to fill them in. Be sure to comment this out as you write your test cases! If your test function executes to the end without failing somewhere (either by failing an assertion or by calling fail directly), the test is considered to have passed.
Tests are automatically generated for each function in the file you are testing. This might include your main function. You can remove this test. However, it is advisable to copy the remaining tests, and run them multiple times. For each test, you should give the function a unique name (for example, testIsEvenNegativeNumbers). You can update the value of each parameter (for example, num in the testIsEven example above), and the expected result from running that function (in the example above, false, since 1 is not an even number). The unit test framework will automatically call your functions with those inputs, and compare the output against the result you indicated that it should expect!