CS173: Intro to Computer Science - ASCII Art (100 Points)
Assignment Goals
The goals of this assignment are:- To traverse and manipulate a 2-dimensional array
- To compute weights from data features
Background Reading and References
Please refer to the following readings and examples offering templates to help get you started:The Assignment
In this assignment [1], you will work with with 2D arrays in Java with a concrete, visual application. Students will write a program to automatically generate “ASCII Art”, which is text that approximates a given image. An example is given below with the UC logo. In this assignment, we will restrict ourselves to characters in the ASCII subset of UTF-8, including lowercase letters, uppercase letters, and some special characters; hence the name “ASCII Art.”
Please download the skeleton code for this assignment. You will be editing src/ASCIIArt.java.
Part 1: Grayscale Images and Text
As we discussed in our 2D arrays module, a 2D array is a natural data structure for image data, since an image is a two dimensional object with both an x and y coordinate for each pixel. In this assignment, we will be dealing with grayscale images, in which each pixel goes from black (0) to white (1). We usually treat the outer array index as a row (y coordinate) and the inner array index as a column (x coordinate). For instance, let’s run the following code, using the methods provided in the assignment:
Picture picture = new Picture("Examples/ursinus.png");
double[][] image = getGrayscaleArray(picture);
This code will load in the Ursinus image at the top of this page as a grayscale image. The figure below shows an example of how to index three different pixels in this image, as well as their value in the array. As you can see, pixels which are darker have a value closer to 0, and pixels which are lighter have a value closer to 1.
![]()
To turn this into text, we observe that certain characters are “darker” than others if we squint our eyes; that is, certain characters require more ink than others to draw in the same area. Our goal, therefore, will be to print out darker characters for darker images in the region, and lighter characters for lighter regions. Let’s consider using all of the character below, for example:
@#BW8gMN6&9RQqE0d$DbpmOa5AH2GZeKPS3X4U%kwohFVyzIsCu{xfn}tJTi17c=jYL?l[]v<>+|)r(/\*_!;^~":,-'.`
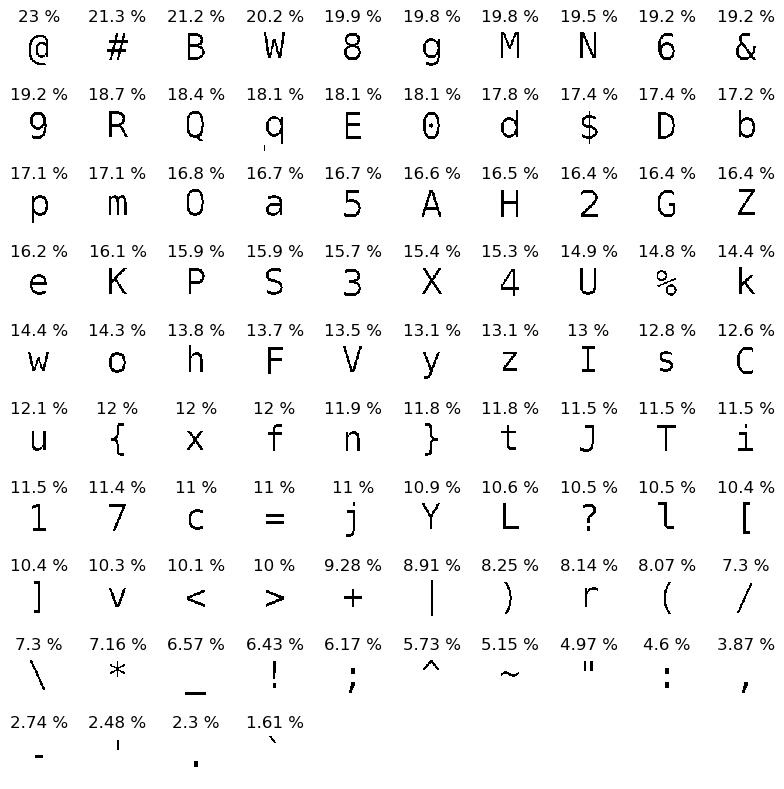
This can be represented as a constant string GRAYSCALE_CHARS, and can be found in the sample code provided. If you look closely, you will see that these characters have been sorted roughly in order from darkest to lightest. Assuming you’re using the default font in Netbeans’s console, the image below shows these characters blown up, along with the percentage of the canvas taken up by their ink:
A constant array called GRAYSCALE_VALUES has also been provided, which is parallel to the array GRAYSCALE_CHARS, and which holds a 0 for the darkest one and a 1 for the lightest one. For instance:
System.out.print(GRAYSCALE_CHARS.charAt(2) + " ");
System.out.print(GRAYSCALE_VALUES[2]);
prints out B 0.08205. This indicates that a B is a darker character, with a grayscale value of only about 0.08.
Part 2: Rectangular Averaging
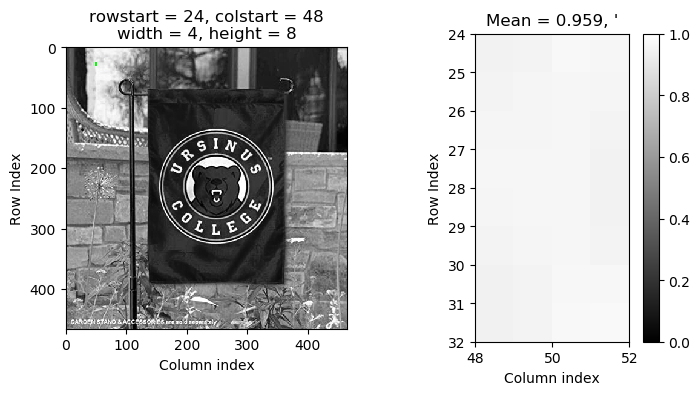
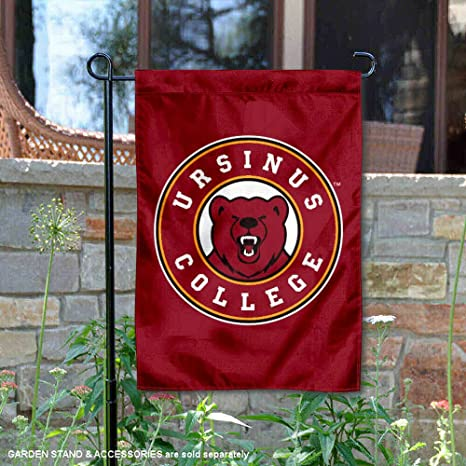
At this point, we could simply print out a row of text for each row in the grayscale image, and print out the character at the index of GRAYSCALE_VALUES with the closest grayscale value. However, not only would this print out way too many characters, but the characters are only printed out half as wide as they are tall, so this would end up printing out an image that’s stretched out by a factor of 2 vertically (the “aspect ratio” would be wrong). To address both of these problems, we can output a single character per block of pixels. In particular, we can average all of the grayscale values in a rectangular block that’s twice as tall as it is wide, and print out a single character for this block. To see an example, let’s consider taking a block that’s 8 pixels tall and 4 pixels wide in different parts of an image of an Ursinus flag.
If we take a block in a bright region, the average grayscale is very high, so it ends up getting a single quote, which has very little ink.
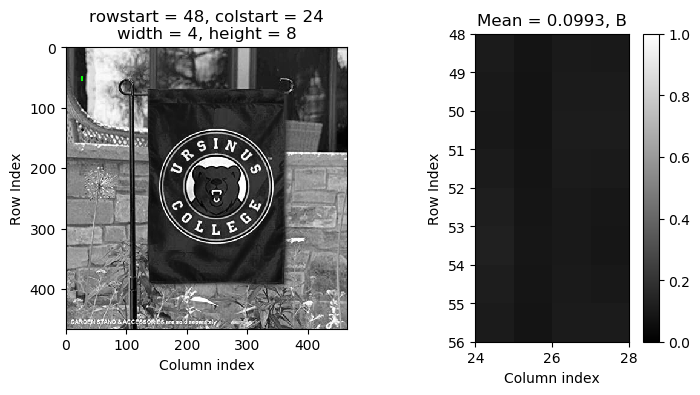
If we take a dark region in the tree, the average is quite low, and it gets an uppercase B, which is one of the characters that uses the most ink.
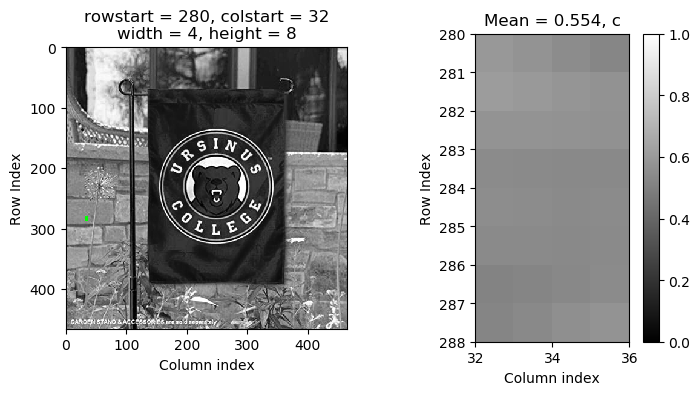
If we take a block that’s one one of the bricks, it’s somewhere in between, so the average is about middle gray, which ends up getting a lowercase c, which uses a medium amount of ink.
When you do this, you should take all non-overlapping blocks in the image that you can. So, for instance, the above image is 466x466 pixels. This means that if we use a block that’s 8 tall and 4 wide, we can fit 59 blocks from top to bottom and 117 blocks from left to right. For instance, the block that started at row 28 and column 32 in the above image is 35 rows down and 8 columns over.
Be careful not to run out of bounds when taking pixels in a block. The rightmost and bottommost blocks won’t actually have 8x4 pixels in them, because you’ll run out of space.
Code to Write
You should fill in ASCIIArt.java to print out rows of text to create ASCII art following the above procedure. You will have to come up with your own methods and way of organizing the code, but you should do the following steps at some point:
- Begin by computing each pixel individually (that is, a width and height of 1). Find the index of the greyscale value nearest to your pixel, and retrieve the corresponding index from the greyscale characters array. This is the character that most closely resembles your pixel.
- Print that pixel to the screen as you move across the row of pixels. Print line breaks at the end of each row of blocks.
- Now, modify this program to specify a width and height of a block. For example, if your width is 4 and your height is 8, you will iterate over the first 8 rows, and the first 4 columns, computing the average greyscale value in the image. You would then consider the first 8 rows and the next set of 4 columns, and so on. When you reach the end of the row, repeat this process for the next set of 8 rows. Your function and loop should not hard code the width and height: they should be variables and function parameters!
- For each non-overlapping block, average the greyscale values in that block, find the character with the closest grayscale value according to
GRAYSCALE_VALUES, and print that character out, like you did before.
Hints
- In the Horstmann book, example 6.3.2 is a helpful reference for finding averages, and example 6.3.3 is a helpful example for finding the closest value to another value when you’re converting from brightness to a character. This is similar to finding the minimum value in a list - except that you are now finding the minimum difference from your greyscale value (how can you compute this?).
- You’ll have to come up with your own way of organizing the code, but it may be a good idea to make a separate method to compute the average grayscale value in a block, and to call this method within a loop that loops through all blocks. You may also want to make a method that finds the character that’s closest to a particular grayscale value.
- As usual, a part of your grade will be on style. So, among other things, be sure you’re naming your variables and methods appropriately.
- Be careful not to go out of bounds when extracting blocks. Blocks at the edges may be smaller than other blocks since you’ll run out of space.
- When you look at the text printed to the console, you will probably have to make the font size very small to see the full picture.
CTRL DOWNmakes the console text smaller andCTRL UPmakes the text larger
Examples
Below are some examples of ASCII art generated with a working implementation.
Ursinus Bear Logo
The following image has been provided in the starter code Examples/ directory.

You can load this in with the following code
Picture picture = new Picture("Examples/ursinus.png");
double[][] image = getGrayscaleArray(picture);
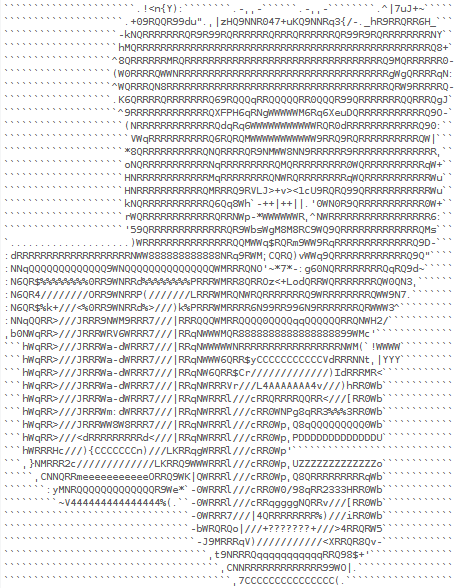
Using blocks with 4 rows tall and 2 columns wide, we get the following ASCII art image:
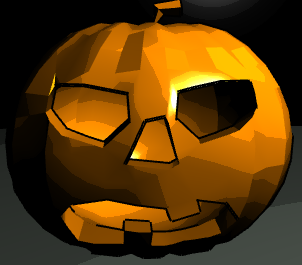
Parker’s Pumpkin
The following image has been provided in the starter code Examples/ directory. It was created by Parker Fairchild in CS 476.
You can load this in with the following code
Picture picture = new Picture("Examples/pumpkin.png");
double[][] image = getGrayscaleArray(picture);
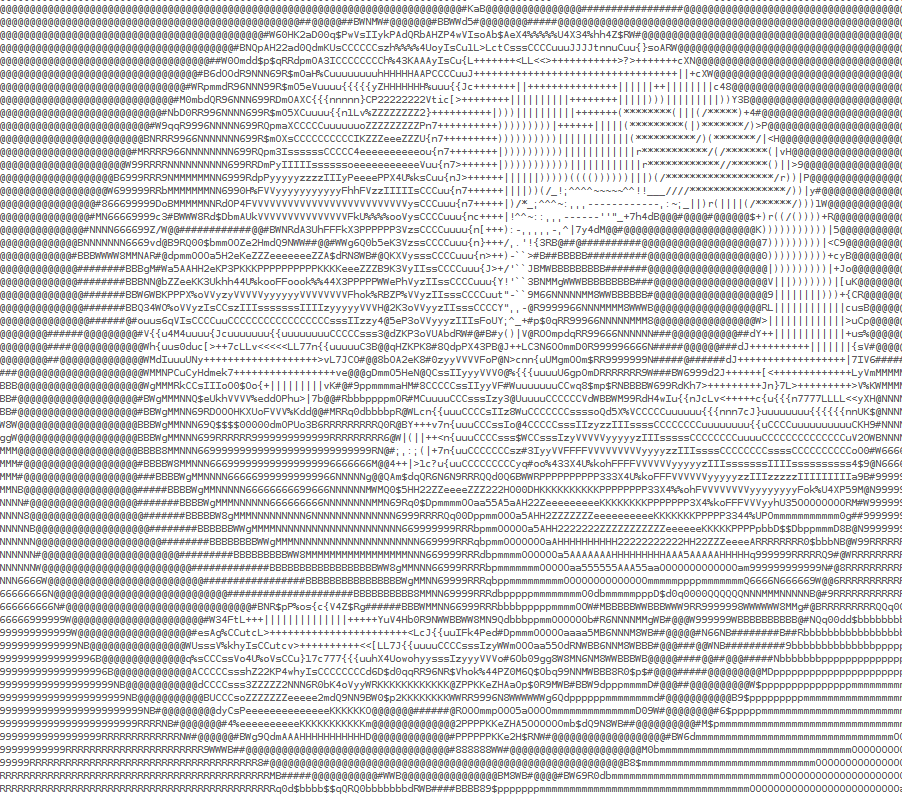
Using blocks with 4 rows tall and 2 columns wide, we get the following ASCII art image:
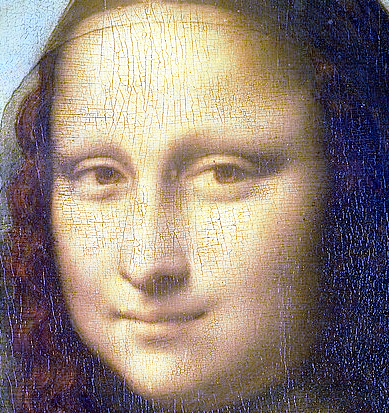
Mona Lisa
The following image has been provided in the starter code Examples/ directory.
You can load this in with the following code
Picture picture = new Picture("Examples/MonaLisa.png");
double[][] image = getGrayscaleArray(picture);
Using blocks with 4 rows tall and 2 columns wide, we get the following ASCII art image:
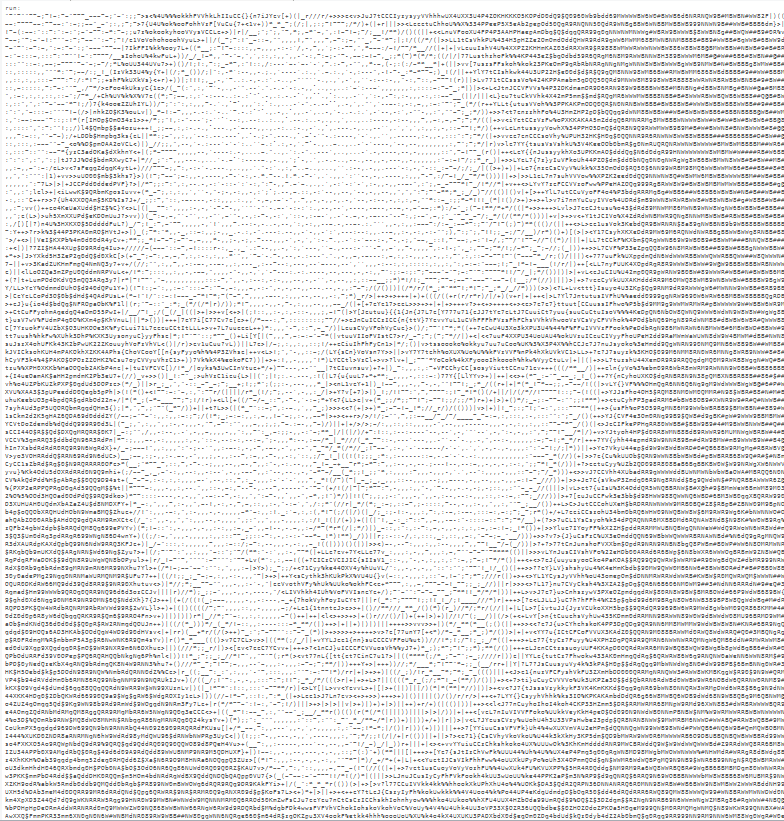
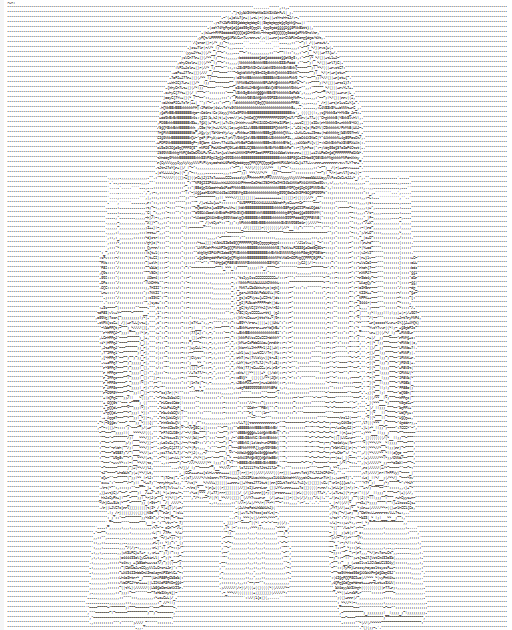
R2 D2
The following image has been provided in the starter code Examples/ directory.
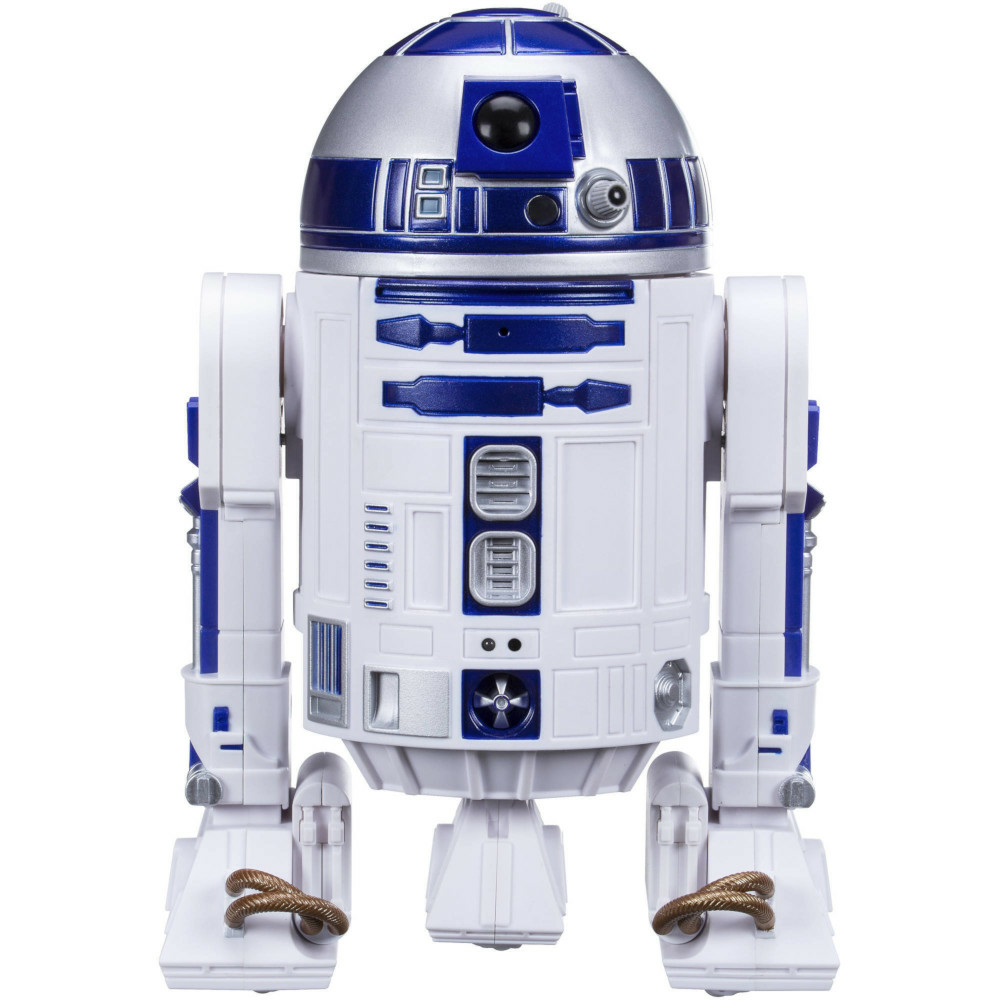
You can load this in with the following code
Picture picture = new Picture("Examples/r2d2.png");
double[][] image = getGrayscaleArray(picture);
Using blocks with 8 rows tall and 4 columns wide, we get the following ASCII art image:
Ursinus Flag
The following image has been provided in the starter code Examples/ directory.
You can load this in with the following code
Picture picture = new Picture("Examples/ursinusFlag.png");
double[][] image = getGrayscaleArray(picture);
Using blocks with 2 rows tall and 1 column wide, we get the following ASCII art image:
Extra Credit: Art Contest
As an optional part of this assignment, students may create a submission as part of an art contest. Any submission whatsoever will receive 7.5% extra credit points, and the winner will receive an additional 7.5% extra cedit points.
In your README, in addition to the standard questions, please also indicate if you have a submission for the art contest. If so, do you give your permission to post publicly on the class web site? What name/pseudonym should I use when posting?
Exporting your Project for Submission
When you’re done, write a README for your project, and save all your files, before exporting your project to ZIP. In your README, answer any bolded questions presented on this page. Here is a video tutorial describing how to write a README for your project, and how to export it.
-
Developed by Prof. Chris Tralie ↩
Design Questions to Help You Begin
Please answer the following questions in your README file before you begin writing your program.- What character is closest to pixel value 0.1? How did you figure that out?
- Suppose there are 20 pixels per row for an image that you're reading, your block size is 8 pixels wide, and you are reading the top row. The upper left corner is pixel (0, 0). What is the x pixel location for the next block that you read, and for the last block that you'll read in that row?
Submission
In your submission, please include answers to any questions asked on the assignment page in your README file. If you wrote code as part of this assignment, please describe your design, approach, and implementation in your README file as well. Finally, include answers to the following questions:- If collaboration with a buddy was permitted, did you work with a buddy on this assignment? If so, who? If not, do you certify that this submission represents your own original work?
- Please identify any and all portions of your submission that were not originally written by you (for example, code originally written by your buddy, or anything taken or adapted from a non-classroom resource). It is always OK to use your textbook and instructor notes; however, you are certifying that any portions not designated as coming from an outside person or source are your own original work.
- Approximately how many hours it took you to finish this assignment (I will not judge you for this at all...I am simply using it to gauge if the assignments are too easy or hard)?
- Your overall impression of the assignment. Did you love it, hate it, or were you neutral? One word answers are fine, but if you have any suggestions for the future let me know.
- Any other concerns that you have. For instance, if you have a bug that you were unable to solve but you made progress, write that here. The more you articulate the problem the more partial credit you will receive (it is fine to leave this blank).
Assignment Rubric
| Description | Pre-Emerging (< 50%) | Beginning (50%) | Progressing (85%) | Proficient (100%) |
|---|---|---|---|---|
| Algorithm Implementation (60%) | The algorithm fails on the test inputs due to major issues, or the program fails to compile and/or run | The algorithm fails on the test inputs due to one or more minor issues | The algorithm is implemented to solve the problem correctly according to given test inputs, but would fail if executed in a general case due to a minor issue or omission in the algorithm design or implementation | A reasonable algorithm is implemented to solve the problem which correctly solves the problem according to the given test inputs, and would be reasonably expected to solve the problem in the general case |
| Code Quality and Documentation (30%) | Code commenting and structure are absent, or code structure departs significantly from best practice, and/or the code departs significantly from the style guide | Code commenting and structure is limited in ways that reduce the readability of the program, and/or there are minor departures from the style guide | Code documentation is present that re-states the explicit code definitions, and/or code is written that mostly adheres to the style guide | Code is documented at non-trivial points in a manner that enhances the readability of the program, and code is written according to the style guide |
| Writeup and Submission (10%) | An incomplete submission is provided | The program is submitted, but not according to the directions in one or more ways (for example, because it is lacking a readme writeup) | The program is submitted according to the directions with a minor omission or correction needed | The program is submitted according to the directions, including a readme writeup describing the solution |
Please refer to the Style Guide for code quality examples and guidelines.