CS173: Intro to Computer Science - NetBeans Software Environment
This guide has been adapted from Professor Tralie.
Software Environment
We will be using the Java programming language in this class. The purpose of the class is not to become an expert in Java, but rather to use Java in the service of learning about other topics in computer science. To make this as easy as possible, we will start with an Integrated Development Environment (IDE) known as Neatbeans, which will make it easy to organize your projects and to run the code you write. It also has some nice tools to help you debug.
Please visit these links to install the Java Development Kit (JDK) and NetBeans. You will install the JDK first, and then NetBeans. Most Windows and Linux users will want the x64 downloads for each of these.
- Java Development Kit
- If you are prompted on the download page, you can select “JDK Download”
- About halfway down the page are the download files. You can choose the one that matches your operating system. Most likely, it’s the one that says “Windows x64 Installer” on Windows, or the one for MacOS if you are using a Mac.
- You can find your download by opening a run dialog (Windows Key + R on Windows), typing “Downloads” in the box that appears, and hitting enter. Double-clicking on the program you downloaded (the filename can be found on the webpage above) will start the process for you.
- NetBeans
- If you are prompted on the download page, you can click “Download” under the “Apache NetBeans” heading (there might be a version number of even the letters “LTS” - meaning “Long Term Support” version; these are fine)
- It’s OK if the version number is higher than the ones in the screenshots in this article, the windows and menus should be the same!
Here are a few notes to help you:
- You will need to allow the installer to make changes to your computer (the software is safe).
- It is fine to use the default location for NetBeans and the JDK.
- Please contact me if you have any difficulty installing or running NetBeans.
NOTE: You may also use Eclipse, IntelliJ Idea, or the terminal (javac and java) if you are more comfortable with them, but the default option is Netbeans, and we will be working through examples in class and in labs with Netbeans. Also, there is a combined download of Java and NetBeans in a single installer. You are welcome to use this, but it is an older version of the software, so things might look a little different from the examples in class.
Instructions for Creating NetBeans Projects
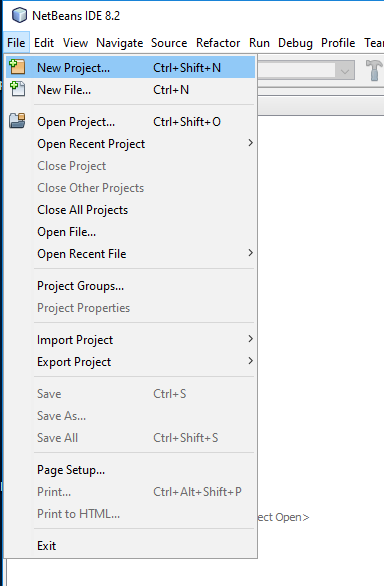
To create a new project, first select File->New Project
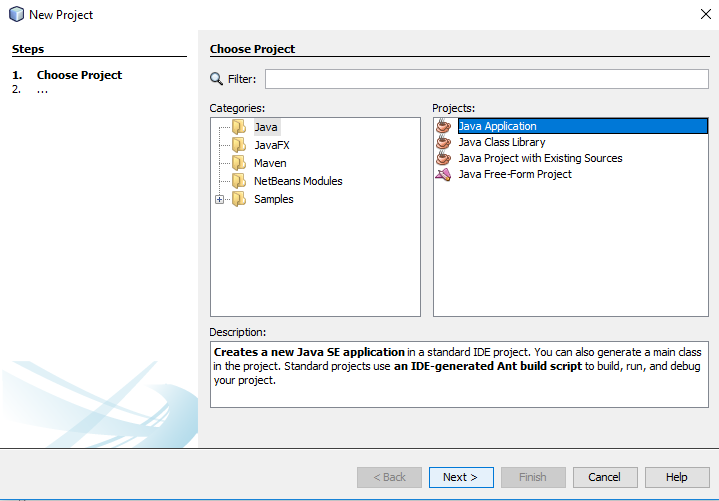
Then, select the projcet type “Java Application” under the “Java for Gradle” section, and click Next
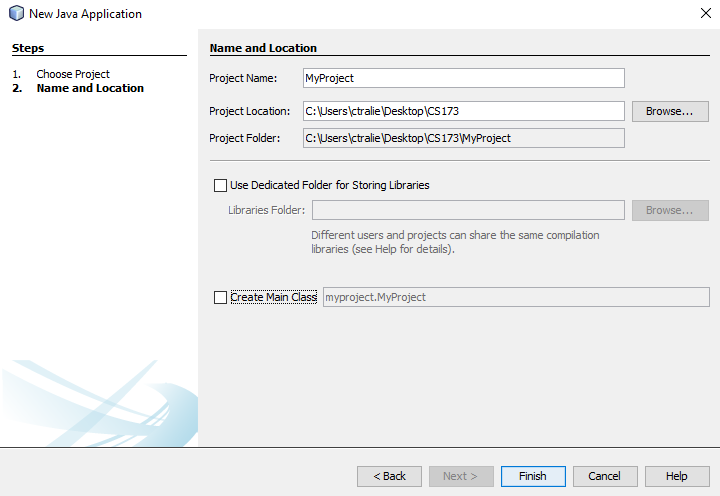
Choose a location and a name for the project. You can uncheck the “Create Main Class” box unless, you want a file with an automatically generated file that runs when you click the play button for this project. But we’re going to start from scratch in this example without a main
When you create a new project for the first time, NetBeans may prompt you to complete the installation of some software (for example, Gradle). This is a one-time occurrence, and you can allow it to do so if asked.
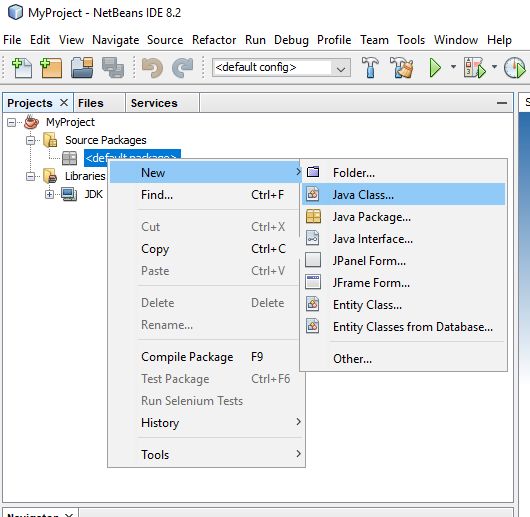
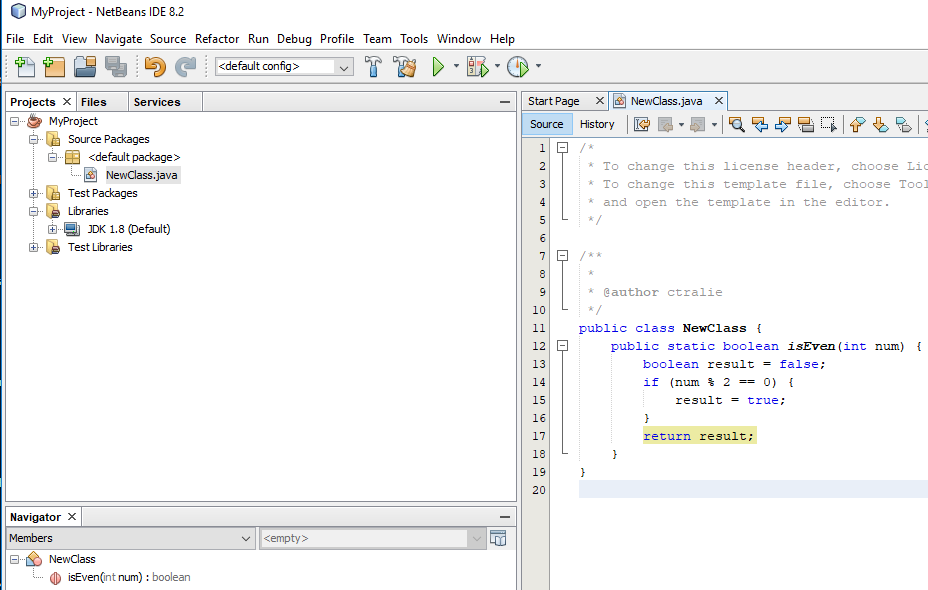
Once the project has been created, you can make a new class by right clicking on default projects and clicking New->Java Class. This will create a new Java file with the name of the class you’ve chosen
Starting a new class like this without a package that you’ve chosen will create a completely empty class definition. We have to add some methods to it ourselves, including a main if we want it to do something when we right click on it and type “run.” For now, we’ll add a public static method that returns true if an integer is even and false otherwise:
Good Coding Style, Testing, Debugging, and Exporting Your Projects
We will use these tools later in the semester, so you can skip them the first time you’re installing the software. However, I’ll include some guides here for when the time comes.
Writing with Good Coding Style with Help from the CheckStyle NetBeans Plugin
Significant emphasis is placed upon good coding style as we introduce the fundamental concepts of software development. This is because it is so important to be able to read others’ code easily. Following a few guidelines will help all of us to write consistent code in a way that does not hide the details of your approach in obscurity. Even I must admit to forgetting the rationale behind complex code that I had written only a few weeks prior! Had I followed these guidelines more closely, I would have saved so much time in the long run by not having to re-read, re-understand, and, sometimes, re-write my old code.
There is an added challenge in learning to code while simultaneously learning to code well, but practicing good habits is the key to learning those good habits. To help you do this, there is a plugin for NetBeans called CheckStyle. The plugin will flag some common poor code styles just like it flags syntax errors and unused variables, to help you optimize your style as you write and to catch potential issues before you forget how your code works (this really does happen!).
You can direct NetBeans to automatically download this plugin. In NetBeans, go to Tools->Plugins and click the Settings tab
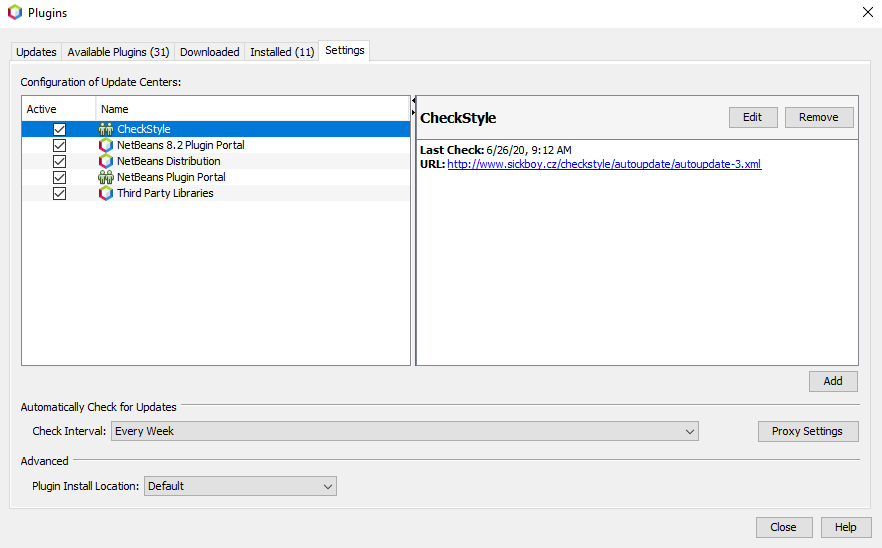
Click Add to provide NetBeans with the URL of the plugin repository which houses our plugins, and paste the following repository URL: http://www.sickboy.cz/checkstyle/autoupdate/autoupdate-3.xml. By installing the plugin directly through NetBeans using a plugin repository, updates to the plugin will be detected and automatically downloaded by NetBeans over time.
Now, you can actually select the plugins from this repository. To do this, go to Tools->Plugins again, and go to the Available Plugins tab
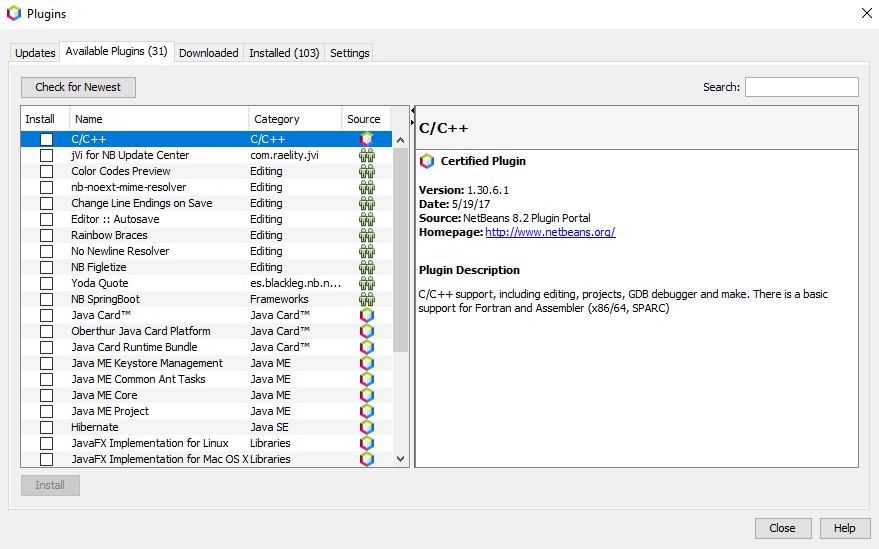
Check the two plugins Checkstyle Beans Library and Checkstyle Beans Plugin, and then click Install. You may need to read and accept a licence agreement or other confirmation prompts to install.
Now CheckStyle should be installed. One final step remains: to configure CheckStyle with the types of code style rules that should be checked. CheckStyle is a nice tool for allowing teams to write consistent code together according to best practices, and also to standards (for example, Google has their own custom set of rules to ensure that everyone writes their code in the same style, even beyond best practices). A configuration file is used to specify these rules. We have created a style file that you can use that includes many of the Style Guide rules, without adding too many additional rules that would be overly pedantic.
You can download our configuration file here. You can save this file by right-clicking on the link and clicking “Save As”. To add our CheckStyle configuration file to the plugin, go to Tools->Options and then the Miscellaneous tab. You will see a tab below this called CheckStyle. Click Browse next to the Configuration File box, and select the file you just downloaded (it is likely in your “Downloads” folder by default, which is fine!).
Writing Test Cases
An important aspect of writing software is testing our code. We will learn to do this during the class, and use the integrated unit test software built into Java and NetBeans. Here is an article on using JUnit, the unit testing framework.
Using the Debugger
In addition to testing, NetBeans includes a debugger that can help identify errors in your code (especially when a test case fails!). Here is an article on using the NetBeans debugger for your projects.
Exporting To Zip
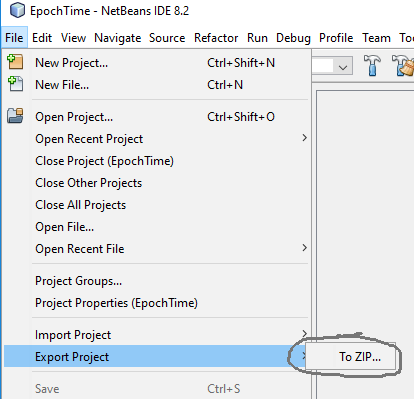
If you want to export your whole project to a zip, go to File->Export Project->To ZIP
Save your file with a .zip extension (that is, MyProject.zip). You can click Browse on the export dialog to choose a location like your Desktop.